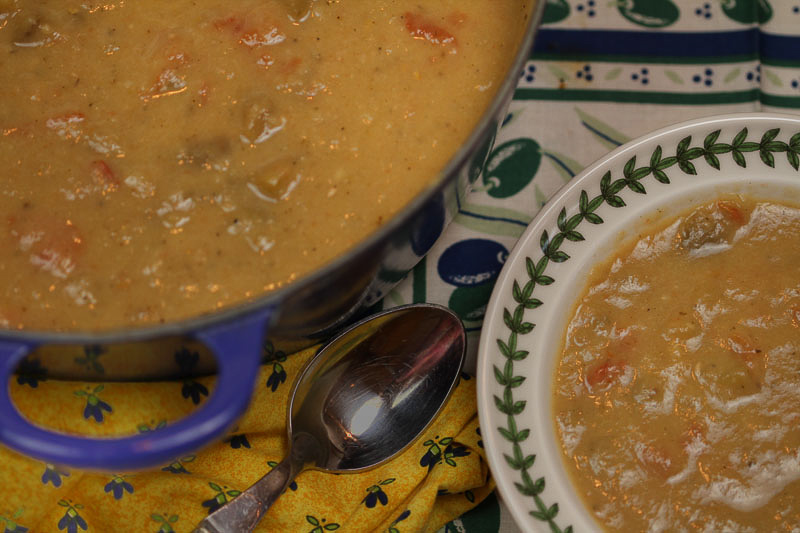
Goat Cheese Butter

"After one taste of French food ... I was hooked. I'd never eaten like that before, I didn't know such food existed. The wonderful attention paid to each detail of the meal was incredible to me. I'd never really drunk good wine before, and knew nothing at all about it. It was simply a whole new life experience.  Julia Child.

Here's a recipe I think you'll love.  Simple, with careful attention paid to each detail.  Just like Julia has taught us.

Read more

Hazelnut Biscotti with Affogato

Happy Summer!  What have you been doing to enjoy summer?  Popsicles?  Pedicure?  Any good summer books?  I'm reading Lies Beneath, by Anne Greenwood Brown.  It's young adult fiction (beachy!) It takes place near and on Lake Superior. The vampire stuff didn't appeal to me, but this book is all about mermaids.  It will make you think twice before you hop on an air mattress. This summer I've been really enjoying an occasional affogato.  What's that you ask?  It's SO good.   Two small scoops of vanilla gelato or ice cream with espresso/strong coffee poured over the top.  A perfect dessert.   Think... root beer float for grown-ups.   Add salted caramel ice cream and it's even better.  Crunchy biscotti are meant to be dunked.  Wine is good, coffee is good, and an affogato... great!   There's really not a fancy recipe for the delight.  Find a cute, small clear glass, add the ice cream, top with coffee/espresso and ta-da!  You'll love it, I promise!

The hosts this week for Baking with Julia are Jodi of Homemade and Wholesome, and Katrina of Baking and Boys.  Just click on one of their links and you'll find the biscotti recipe.

I'm late getting this post out, but... better late than never, as they say!  It's been so hot, and so dry, and I really didn't feel like baking today.   However,  biscotti recipe is very easy and fun.  So I cranked up the A/C and here they are!

Biscotti require two baking sessions.  The first time is about 35 minutes.  This bakes the log shape.  Then, after a short cooling period, the biscotti are sliced, they're baked again on a wire rack to dry and toast the sweet cookies.  I found that it went quickly.  There was the perfect amount of dough to make about a dozen good sized biscotti.  Some to eat, and some to share.   I stayed pretty true to the recipe.  Though I used chopped hazelnuts that I only toasted and didn't boil, and used Cointreau for the liqueur for the nice subtle orange flavor.

sliced-biscotti-5

sliced-biscotti-5

First the dough is pressed into a log and 12 inches by 3 inches.

biscotti-dough-1

biscotti-dough-1

Once it's baked, it's sliced on the diagonal and placed on a wire rack.  Then back into the oven for another 15 minutes or so, until light brown and crunchy.

precut-baked-biscotti-2

precut-baked-biscotti-2

biscotti-ready-for-second-bake-3

biscotti-ready-for-second-bake-3

 Stay cool, bake when you can, and try an affogato soon!

biscotti-and-affogato-8

biscotti-and-affogato-8

Lemon Loaf Cake - Baking with Julia

This week's recipe is from Baking with Julia, and is part of the blogging group Tuesdays with Dorie. As the old saying goes... "When at first you don't succeed, try, try, again"!    Or how about,  "If it's worth doing, it's worth doing right". So I did.  Again.

My first attempt at the Lemon Cake didn't go very well.   It was my fault.   I know exactly why.   I didn't give the ingredients the attention they deserved.  The cake was dense, but not in a good way, and a little tough.   My redo was much better.  I'll try to explain the details.

The recipe has the usual cast of characters.  Eggs, sugar, flour, baking soda, heavy cream, and butter.

The first time, I read through the recipe and tossed the eggs & sugar in the mixer.  First mistake.  While it was ok and the right thing to do to add them together, it was way too much power.  A gentle whisk was the ticket.  I mixed the second batch with a balloon whisk.    Remember that when you add eggs to sugar, you should start whisking right away.  The chemical reaction that occurs when they mix is heat.  You want the cake the be tender, and not have little bits of microscopic scrambled eggs making the texture - well... rough.

Attempt one had no sifting.  What was I thinking?  Any good sponge or simple cake like this should be sifted.  I got out my sieve and sifted the baking powder and cake flour together for  a much lighter and well-combined mixture.    If you don't have a sifter, just take your whisk and whisk the flour to fluff it and break up any clumps.   Time for true confessions. The first time, I threw caution to the wind, and used all-purpose flour.   The second time, I used real cake flour.  Want to know the difference?  Cake flour has very low protein.  When you add the liquid and start to mix, very little gluten is created.  Therefore, there's very little chance of creating elasticity and rubbery cake.    For a cake with such simple ingredients, and only lemon zest for flavor, this is really important.  Don't get me wrong, all-purpose flour is great for some cakes, cookies and muffins.  Just be careful not to overmix.

Now on to the butter.  This is a very picky point, but to make a great cake in this category (madeleines, pound cake, etc.), you want to be sure your butter is melted and cooled;  and separated.  Let the butter rest in the clear container.  Allow the milk solids to settle to the bottom.  When you pour the butter into your recipe, make sure those milk solids stay in the container and don't end up in the batter.  This will also help with a tender, light pleasing texture.    Here's a photo of the butter as it settles.  See the milk solids on the bottom?

I was going to scratch up this recipe to just average, when I realized  it was me being average about my approach.  It's a really gentle, sweet, cake perfect for any brunch, coffee, or present for a friend.  I think it would be great grilled or toasted.

Just one more quote for Eleanor Roosevelt,  "It takes longer to explain why you did something wrong, than to do it right".   From now on, no rushing, no shortcuts, and more happy endings!  Thank you for listening to my long explanation!

Please try this recipe and let me know what you think.  Truc and Michelle, are the two hosts for this week's Tuesdays with Dorie - Baking with Julia and have the recipe posted on their blogs.  Coming up, a great recipe using coconut from Around My French Table.   Talk to you soon!

Baking with Julia Week 1: White Bread

It's finally February 7th!  I've been waiting patiently (well, not so patiently) for today.   Today is the very first week of Baking with Julia, a baking group coordinated by Dorie Greenspan.  The original group baked its way though Dorie's Baking book.  They completely the recipes and were ready for the next challenge.  Dorie Greenspan authored Baking with Julia, so its fitting her book is next. Twice each month, we'll bake two recipes from the book and post to http://tuesdayswithdorie.wordpress.com/     As some of you may know, I also participate in French Fridays with Dorie, which bakes & cooks recipes from Around My French Table.

I never had the opportunity to meet Julia Child, but I love her.  I love her fearless spirit, her laugh, her stature, and most of all her love of cooking.   When I pull out her books and read a recipe, its her voice I hear reading to me.   If something spills or doesn't turn out quite right, she's there in spirit with her happy, let's move on, coaching.  I know things will turn out fine.   My hope is that I can inspire people the way she does some day.

I hope you'll pick up a copy of the book and bake along with me.   Feel free to add your link or notes in my comments area.  Or, sign up with the group.   The February 21st recipe is Chocolate Truffle Tartlets!  Can't wait!

Let's start baking!

Of all the categories in the patisserie world, I think I like bread making the best.   It takes times, patience, and the coordination of efforts with dough.    Yeast is in charge of most of the process.  You can try to rush it, but its really going to do what it pleases.   It's more like a duet.

The recipe makes two loaves of bread.  I doubled the recipe (exactly) for make four loaves.   I also used my French bread kneading machine just to pull the dough together.   I finished the dough my hand.  The machine is to cool.  It turns against the doughs friction against the side as the hook pulls and turns the dough.  Just the action that you do with your hands.  It allows me to make bigger batches, and have my hands free for other baking.   It's very gentle, and still requires fairly close supervision so the dough doesn't wander up the hook or out of the bowl.  We used a machine like this at school, and I was able to find one when I got home.  I can make up to about 10 loaves of bread in it at a time.  Not huge production, but bigger quantities than can easily be done by hand.

Once the dough was mixed, it rested for about 5 minutes.  This process is called autolyse.  The yeast gets started, the flour and water setttle in, and the gluten begins to develop.

When I'm teaching a bread class, the number one question is always. "How long will I knead the dough?"  The best way to know that you're finished kneading it to check a gluten window.   Gently cut off a small piece of dough, gently tease/strectch the dough with your fingers and look for a sheer pane of dough that wont' tear as it's being stretched.   It you can make it sheer without tearing, you're finished!   Here' a photo of the White Breads' gluten window.

Notice the light coming through the sheer dough.  I was doing the photography and stretching myself, so the dough isn't stretched as thin or far as I would have like.    Every single time I make bread, I check for the window.  Every batch is different, and I always want to make sure I've worked the dough enough.

After the dough has had a good rise, and at least doubled in volume, it's time to shape the loaves.  I weighed the whole batch, then divided by four to make sure each loaf was about the same size.  You certainly don't have to be this picky, but baking is much more even when the loaves are the same.   I like to cover the bread pans with a favorite towel.  Call me superstitous.   By the way, did I tell you that I always spin the dough three times, then flip it in the bowl before it starts to rise?   Habits are good!

Here are the sweet loaves shaped and ready for the 2nd rise.
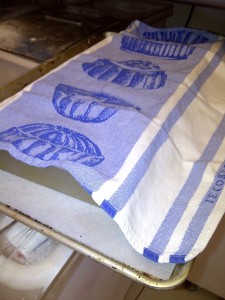
The 2nd rise is about an hour.  The key to to let the bread rise until the loaf is about 1 inch about the top of the pan.  That way, with the added spring in the oven, you'll have a nice tall loaf  with perfectconsistency to the crumb.  This recipe has a little bit more yeast than some recipes, so the bread rose faster than I was expecting.  It's just a bit taller than usual, but doesn't it look great!??
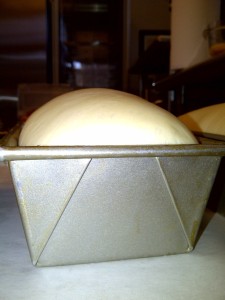
Now into the oven!  The yeast will work like crazy as the temperature of the dough increases.  Once the dough reached about 120 F, the yeast will die, and bread will be it's finished size.    I bake the dough until the internal temperature is about 180-200F.   Just push an instant read thermometer right into the end.  You can also pop the dough of the pan and look at the color.   It should be golden.  Once you've got the temp and color, try to tap the loaf and listen to the "hollow" thump.   It's hard to know that sound unless you know the bread is done.    I turn the bread out of the pans immediately and let them cool on their sides.  OK, another weird habit, but it works.   I pulled this bread out of the oven at about 195F and liked the pretty light golden color.  This was JUST enough.   It could have easily gone another 5 minutes.  It's great for toast.  Don't underbake your bread.  The golden color is caramelization of the sugars which equals flavor!

The bread is cool, and upon inspection, no swirly holes.   It has a nice soft but sturdy, consistent crumb.   And... look at the cute shape of the loaves.  They look like the cookie cutter shape of bread!  and...not too high to fit into the toaster!

I hope you'll join me in two weeks for the Chocolate Truffle Tartlets.  In the words of our dear Julia,  "Bon Appetit"!