Goat Cheese Butter

"After one taste of French food ... I was hooked. I'd never eaten like that before, I didn't know such food existed. The wonderful attention paid to each detail of the meal was incredible to me. I'd never really drunk good wine before, and knew nothing at all about it. It was simply a whole new life experience.  Julia Child.

Here's a recipe I think you'll love.  Simple, with careful attention paid to each detail.  Just like Julia has taught us.

Read more

Lemon Barley Pilaf

pilaf plated by . Whew!  It's been a busy week, and I'm late in getting this post off.   This is an Around My French Table recipe and part of the French Fridays with Dorie blogging group.  You know the drill for these recipe.  We're asked not to post the recipe, but you can find it in the book.   Just in case you don't have to book, I have good news for you.   August will mark Julia Child's 100th birthday month.   To celebrate, I'll be blogging some of her most famous recipes with some stories, fun facts and quotes from our dear Julia.    Any requests?


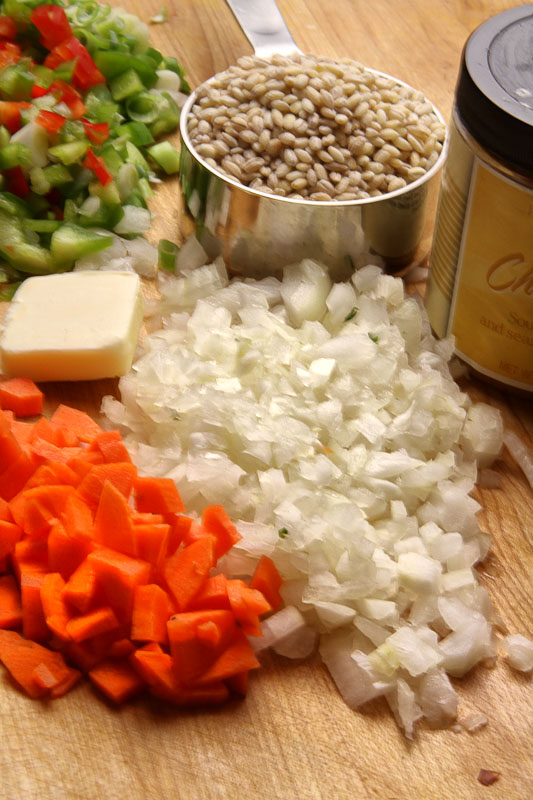
Well back to the pilaf... I love barley and was very interested to try the recipe.   My friend Jane makes a great salad with barley and tuna.  It's so good on a hot summer day.    I simmered the barley on the stove, and carefully added the chopped vegetables just as Dorie suggested so they didn't overcook.

pilaf ingredients by .


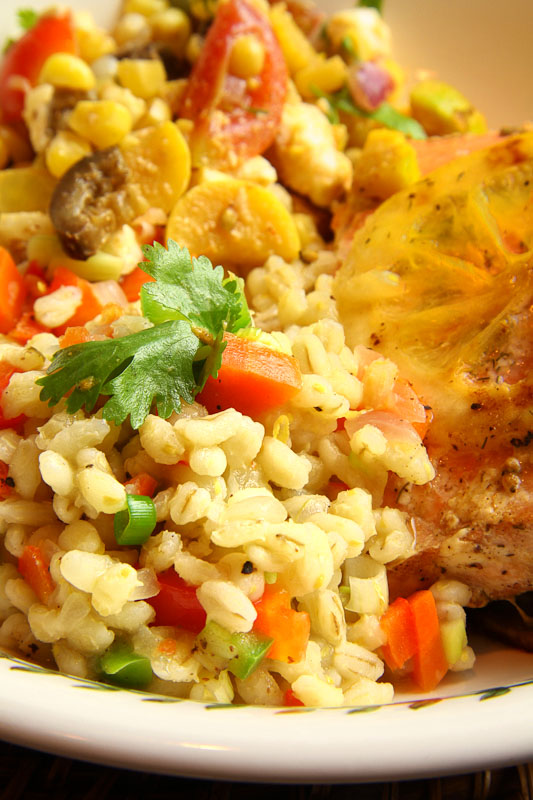
The pilaf was tasty, and make a nice side dish with the grilled corn salad and salmon with dill and lemon.

pilaf final by .


Grilled Corn Salad

What an exciting weekend!  I'm back from  San Francisco.   I went for a class on food styling and tips on food photography.   It was really fun and very interesting.   Joy Wilson from Joy the Baker sand Tracy from Shutterbean were the teachers.   They were full of ideas and great information.  Now the trick is to put it to good use.   Tracy and Joy prepared two recipes, and we got to style and shoot using our new props and tips.  Here are some oat bars, and my best shot of the day.

Walnut Oat Bars
Walnut Oat Bars

It's been awhile since I was in San Francisco.  What a gorgeous city!    The hotel's driver/maintenance man invited Gary and I to the roof top to see the view on our last morning there.   Amazing!

Here's my postcard to all of you!

Golden Gate Bridge
Golden Gate Bridge

Upon arrving home, I found our CSA box brimming with lots of fresh vegetables.   I wanted to make something crunchy, tasty and cool.  My version of a grilled corn salad - minus the grill.

The best part about this recipe is that you can use anything you like and leave out the things you don't like.   I had little baby eggplants, zucchini, red onion, cherry tomatoes and fresh sweet corn.

Beautiful Produce!
Beautiful Produce!

To start, shuck the corn and carefully slice off the cob.  Then,heat a grill pan or skillet and place the corn in a single layer ith just a little olive oil.  I used about 2 1/2 cups of corn and about 2 tsp. oil.  Let the pan get hot, really hot.  The corn will sizzle and snap.  Get it quick stir and your should see searing on the corn.  Move to corn to a heat proof bowl.  Add eggplant (I didn't peel mine), and zucchini to the pan and saute for 3-4 minutes, just to heat through.  Add these vegetables to the corn and toss.

grilled corn
grilled corn

Now for the fun part.   Add other chopped vegetables, feta, black bean, cilantro/parsley... anything you like.

My salad included parsley, red onion, cilantro and a small piece of feta I had left over from another meal.

To finish the salad, mix in 1 T lime juice or vinegar, salt, pepper, cumin and chili powder.

You can eat the salad warm, or cover, chill and enjoylater.   This salad is great with any grilled meat, or by itself for a light supper.

To print this recipe, click HERE

Grilled Corn Salad

2 1/2 cups corn (kernels)

1/2 -1 cup chopped zucchini

1 cup chopped eggplant

1 small red onion or scallions, chopped finely

1 can black beans (optional) rinsed

1/4 cup chopped parsley, cilantro or both

1/4 cup feta cheese, cut into 1/2 inch pieces

1 cup cherry tomoates, or 1 large tomato, chopped

1 T olive oil

1 T red or white wine vinegar (or a squeeze of 1/2 lime)

1/2 tsp. chili powder

1/2 tsp cumin powder

salt/pepper to taste

Shuck corn and remove from the cob.  Heat a skillet or grill pan with 1-2 tsp olive oil.  Add corn in a single layer and sear until light brown marks appear on some of the kernels.  Remove from pan to bowl.   Add zucchin and egglant to pan and saute for 3-4 minutes.  Transfer vegetables to the bowl with the corn.  Add the chopped onion, and black beans.  Add remaining olive oi, vinegar and spices.  Toss in tomato, feta and mix gently.   Remember, you can add any other vegetables or spices to make it your own!

Happy Summer!

corn-salad
corn-salad

Chewy Crunchy Granola

Are you planning any vacations this summer?  Stay-cations?   It doesn't matter how far you're going, or how you're getting there, you're going to need a snack.  Something to take the edge off of your hunger as you travel from point A to point B.   Rather than pick up a sweet, calorie-filled nutrition bar at the gas station or magazine counter at the airport, toss a baggie of this great granola in your bag. Way back when, I learned a little rhyme in Girl Scouts for packing a lunch .  It goes something like this...

Something munchy, something crunchy, something juicy, something sweet.

Nothing gooey, nothing drippy, nothing sticky, nothing soggy.

It might be corny, but it's true.  There's nothing worse than a big spot on the front of your shirt as arrive at your destination.

   As you know, we've undergone some big dietary changes around our house.   Gary's doing great, and has become the salad king.   In a never-ending effort to find good food and keep control of the fat and sugar we were looking for a healthy granola recipe.   This recipe comes from our friend who's been making it for a long time.  She's tweaked the original in volume and fat.  I ran the nutritional data on the recipe, and 1/4 cup (about 30 gm)  is about 120 calories and about 20gm of carbohydrate.  Perfect for topping some yogurt or nibbling with the piece of fruit.

img_6928-3
img_6928-3
granola-ingredients-1

To print this recipe, click HERE

Granola   (Adapted from Granola of the Gods)

5 cups rolled oats

1/2 cup brown sugar (I used Brown Sugar Splenda)

1/2 cup whole wheat flour

1 cup nuts, slightly chopped (almond and walnuts!)

1/2 nonfat dry milk

1/2 cup coconut (optional)

1/3 cup vegetable oil

1/3 cup honey

1 egg

1 tsp. vanilla

water

 1/2 cup Raisins or Craisins.

Instructions:

Preheat oven to 225 degrees F.  Mix dry ingredients together (except raisins).  In a separate bowl, whisk wet ingredients together.  Pour wet over dry and mix.  Spread on a jelly roll pan or in a 13 x 9  pan.  Sprinkle with about 2 T water.  Bake for 45 minutes, stirring twice during baking.   If you'd like it dryer or crunchier, increase oven to 300 degrees and bake for another 20 minutes or until more golden.   Turn off the oven, and allow the granola to cool.  The granola can be removed from the oven right away, but won't be a crunchy.  When it's cool, add the raisins or craisins as desired.   Store in an airtight container.


I hope you enjoy this as much as we have.  Happy summer and happy travels!

granola-2
granola-2

Blueberry Mascarpone Roulade

It's fun when you can combine a things you really like to do into one project.   The roulade from French Fridays with Dorie, fits the bill.

  • Recipes that require careful technique and a few steps are more fun
  • Birthdays should be celebrated for a week
  • Mascarpone should be its own food group
  • Roulade whether sweet of savory is kind of glamorous

When I saw Roulade in the recipe name, I knew this was going to be fun.   A friend of ours was turning a "Zero" birthday, and I wanted an extra special birthday treat.   We'd have a nice light and cool dessert to celebrate.

Simple, pretty and full of sweet blueberries.  The preparation of the berries is wonderful.   Bring sugar and water to a boil, add the berries and turn off the heat.  The berries plump but won't burst.   When they dry, they're sticking and sweet.  You could almost spread them like jam.   SO good!

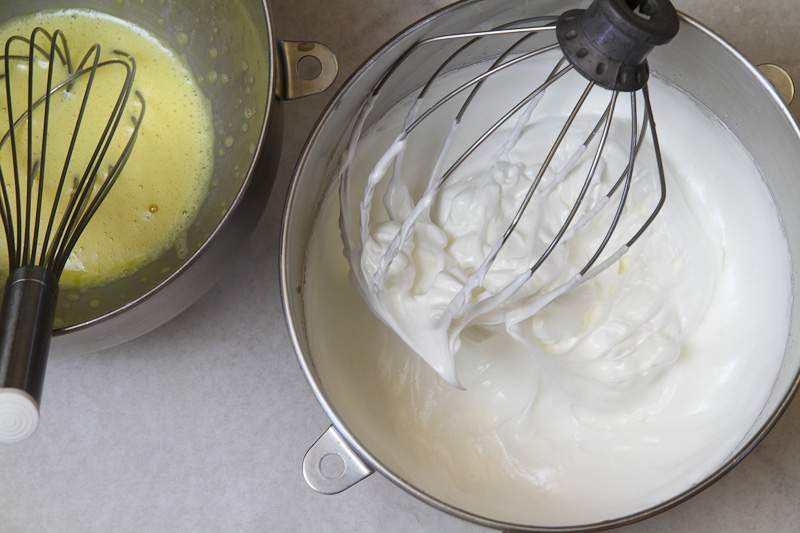
The  recipe isn't really hard, but careful attention is required to make sure your sponge cake is just right.   Here's a photo of the eggs just before they're combined with the flourl

eggs-whites-1

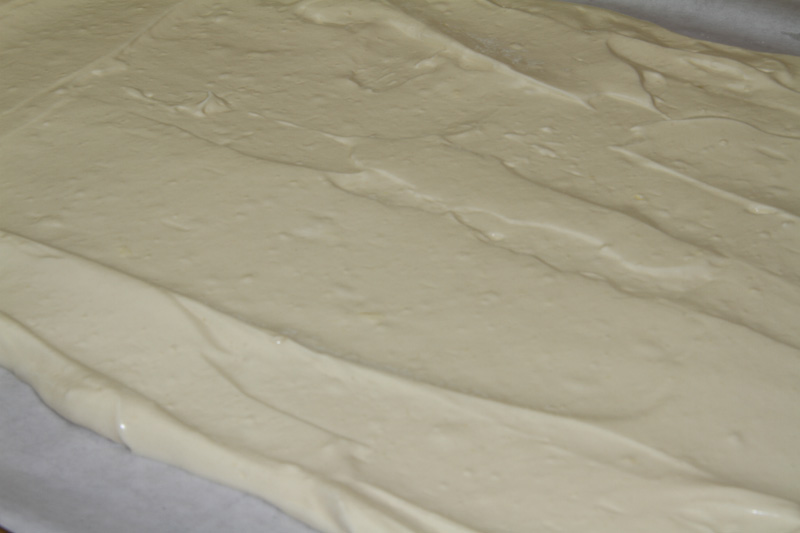
Here's the pretty sponge before baking...

sponge-cake-ready-for-oven-4

baked-sponge-cake-5

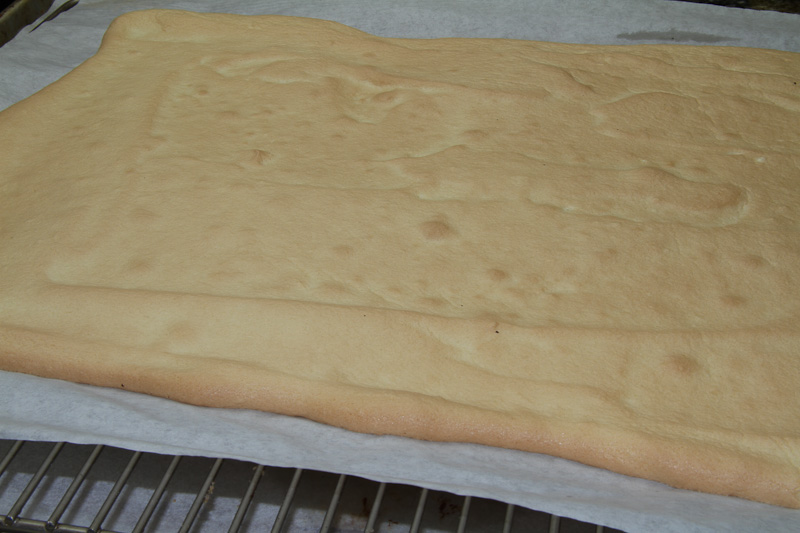
And this is the after.  Golden, tender and ready to be rolled.

towel-with-sugar-and-sponge-cake-6

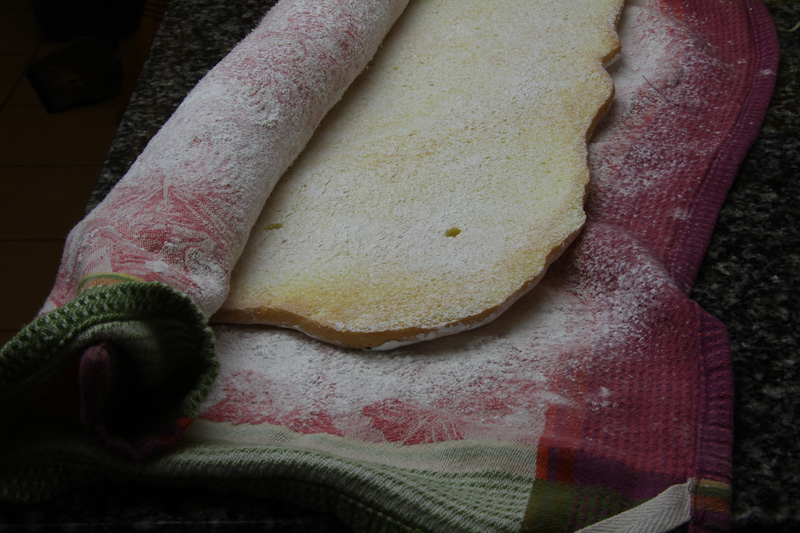
It's never really made sense to me that you could roll a sheet of sponge cake in a towel.  I had it all wrapped up and ready to cool, and realized that you really needed to see what this looks like.   The towel is dusted with powdered sugar, the sponge cake goes straight on it while it's warm, then it's rolled up and cooled.  The cake takes the shape so it will roll nicely when the filling is added.

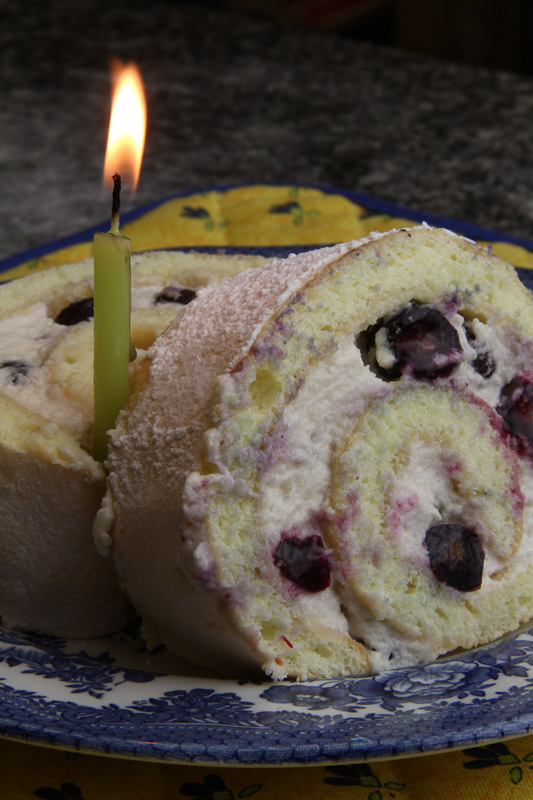
Sorry I don't have a photo of the blueberries and cream on the sponge before I rolled it.  I was a in the zone and forgot to grab the camera .   Here's the finished dessert.  If you don't have a copy of Around My French Table, by Dorie Greenspan,  I highly recommend the book.   It's full of great recipes with carefully written instructions.

blueberry-roulade-7


Hazelnut Biscotti with Affogato

Happy Summer!  What have you been doing to enjoy summer?  Popsicles?  Pedicure?  Any good summer books?  I'm reading Lies Beneath, by Anne Greenwood Brown.  It's young adult fiction (beachy!) It takes place near and on Lake Superior. The vampire stuff didn't appeal to me, but this book is all about mermaids.  It will make you think twice before you hop on an air mattress. This summer I've been really enjoying an occasional affogato.  What's that you ask?  It's SO good.   Two small scoops of vanilla gelato or ice cream with espresso/strong coffee poured over the top.  A perfect dessert.   Think... root beer float for grown-ups.   Add salted caramel ice cream and it's even better.  Crunchy biscotti are meant to be dunked.  Wine is good, coffee is good, and an affogato... great!   There's really not a fancy recipe for the delight.  Find a cute, small clear glass, add the ice cream, top with coffee/espresso and ta-da!  You'll love it, I promise!

The hosts this week for Baking with Julia are Jodi of Homemade and Wholesome, and Katrina of Baking and Boys.  Just click on one of their links and you'll find the biscotti recipe.

I'm late getting this post out, but... better late than never, as they say!  It's been so hot, and so dry, and I really didn't feel like baking today.   However,  biscotti recipe is very easy and fun.  So I cranked up the A/C and here they are!

Biscotti require two baking sessions.  The first time is about 35 minutes.  This bakes the log shape.  Then, after a short cooling period, the biscotti are sliced, they're baked again on a wire rack to dry and toast the sweet cookies.  I found that it went quickly.  There was the perfect amount of dough to make about a dozen good sized biscotti.  Some to eat, and some to share.   I stayed pretty true to the recipe.  Though I used chopped hazelnuts that I only toasted and didn't boil, and used Cointreau for the liqueur for the nice subtle orange flavor.

sliced-biscotti-5

sliced-biscotti-5

First the dough is pressed into a log and 12 inches by 3 inches.

biscotti-dough-1

biscotti-dough-1

Once it's baked, it's sliced on the diagonal and placed on a wire rack.  Then back into the oven for another 15 minutes or so, until light brown and crunchy.

precut-baked-biscotti-2

precut-baked-biscotti-2

biscotti-ready-for-second-bake-3

biscotti-ready-for-second-bake-3

 Stay cool, bake when you can, and try an affogato soon!

biscotti-and-affogato-8

biscotti-and-affogato-8

Preserving Peaches

img_6776-2  

There are so many quotes about trying new things, making mistakes, being adventurous, etc.  so I thought I'd take that advice and try something new.  New to me.   No ski diving, or zip lining, just a new food preparation that has been around for years.  Canning!  For those of you who don't know how, please hang in there with me.   You might be able to find a big box of fruit at a market, grab a few friends, pitch in and buy the equipment, and be as thrilled as I am.   Canning is kind of like trying on Birkenstock sandals.   It seems really strange the first few times, and you skip it.  Then one day, it's the day.  Today was that day!

If you took a survey of the farm women living in this county, I bet 90% or more can fruits and vegetables each summer.  No fear.  Just good common sense and years of practice.


I've really wanted to try it.  I'm not going to make a big production out of it.  Just a few quarts of peaches.   The worst that could happen is that the jars won't seal and we'll have to eat them sooner than expected.   The best thing?  I'll have quarts of peaches at the ready, and a great deal of satisfaction.

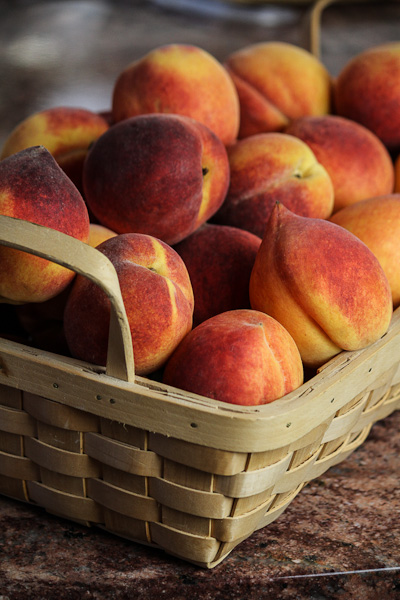
Last Tuesday, I got a big box of peaches from a truck driving through from Georgia.  My friend waited in a  line of about 100 people also in pursuit of the wonderful fruit.  They ripened perfectly.   I made peach tarts for the Farmers' Market, ate serveral peaches, gave peaches away, and still had a worrisome amount I feared might spoil.  Peach pie?  Sure, then what?   Canning seemed like a great idea.  I know that canned peaches don't sound glamourous, but they won't be stringy, squishy or mushy.  Promise.

We've canned applesauce and pickles, but never peaches.  Enter the internet. I found a great preserving/canning site and read the specs for peaches. I had every thing on hand, plus the time.

First, gather the cast of characters needed for all canning jobs.

1.  Giant Canning pot (cheap, can double as party ice bucket, apple bobbing, felting... you get it.)

2.  Jars.  Classic Ball jars - I choose wide mouth

3.  Rings and Lids (always use new lids, they don't get re-used)

4.  Lots of clean towels, and all of your burners on the stove.

5.  Tongs and Jar Grabber

img_6775-1

The Jars, Lids, and Rings can be found in almost any grocery/hardware store.

img_6782-8

And for those of you who need a little more specifics, here is a jar, a ring and a lid.

img_6785-11

This is kind of like rubbing your stomach and patting your head.  Lots to do all at once.

First, get the jars clean.  Run them through your dishwasher, or bring them to a boil/simmer for about 10 minutes upside down in a stock pot of water.  Lift them out, and let them, turn right side up.  The air will dry them quickly.

Second, fill the big pot with warm water and begin bringing it to a simmer.  Start another small saucepan simmering with the lids and rings.

Now, start the syrup.  I made a lighter syrup.   2 cups of sugar for every 1 quart of water.  Bring the sugar and water to a boil, then keep warm.

We haven't even touched the peaches yet!

Once all the jar are clean, and the lids and rings are ready, take about 6 peaches, and gently drop them into boiling water for about 30 seconds.  Using a slotted spoon or skimmer, lift from the water and place in cold water.  The skins will slip right off.   I decided to can peach halves for more flexibility later.   If you slice along the dent/fold in the peach and follow all the way around, the peach will easily separate from the pit.   That part was the most fun.

Place the peach halves pit side down in the jar. Give them a push to make sure they're tight.  Pack to just below the neck of the jar.  Fill the jar with the syrup, to withing 1/2 inch of the top.  Try to be exact for this part.   Using a butter knife, slide it up and down the side of the jar, to encourage any air bubbles to float to the top.   Clean the rim of the jar with a clean paper towel, then with tongs, take a lid from the simmering water and place it on the jar.  Then a ring,  but not too tight.

Your pot should have a stand, or rack inside to make sure water can circulate completely around the jars.  Set jar one the warm water, and repeat with the remaining peaches and jars.  If you prepare to many peaches at once, you risk them turning brown.   It's ok to use lemon juice or pectin, but I didn't.

When you have all the jars ready, add more water to the pot so the jars are covered by at least an inch of water.  Bring the water to a rolling boil.  Start timing when it's a rolling boil.  I live in about 875 feet above sea level so my processing time was 35 minutes.

Processing Times, Tips and Trouble Shooting

Once the processing is complete, carefully remove the jars to a towel and allow them to cool undisturbed until cool.  While they're cooling you'll hear the jars seal with little (or not so little) pops.   Any jars that don't seal should be placed in the refrigerator and eaten within a few days.

I heard four pops from four jars.

img_6792-14

 I can't wait to pop open a jar (pun intended), and try the peached with some ice cream, or an old-fashioned favorite, cottage cheese.   I still have 12 peaches left who I'm sure will be a pie very soon.

Try something new today!


Strawberry Cream Cake

  img_6644-11


What a treat!  Don't you LOVE strawberries?  I do.  Very much!

Last summer I went to the close-out sale of the Farm & Fleet garden center.  They set it up each spring, and close it sometime in June, or July.  I found four strawberry plants that needed a home.  They didn't have a variety or pedigree, they were marked "strawberry".   I brought them home and planted them in the little herb garden behind the wood oven next to the oregano and thyme.   I ddn't expect much from them, but hoped they would at least survive.  And survive they did.   One day on late May I was weeding, and found at least three that were nearly ready to pick.   They were very early... with a few others nearly ready as well.

My parents were visiting (inportant note:  My dad has a degree in horticulture and agronomy...) and I proudly picked two ripe berries.  We shared them, and ooh'ed and ahh'ed about how delicious they were.   I named them One and Two.   A few days later,  I picked Two and Three, followed by Four, Five, Six and Seven.    I won't bore you with the details, but suffice to say that I grew 14 strawberries!

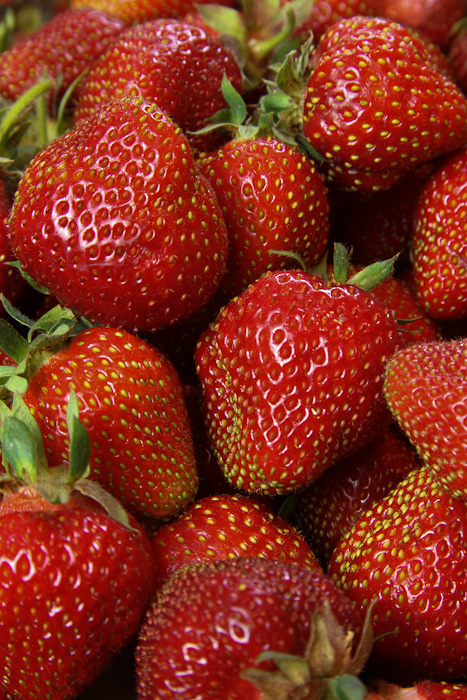
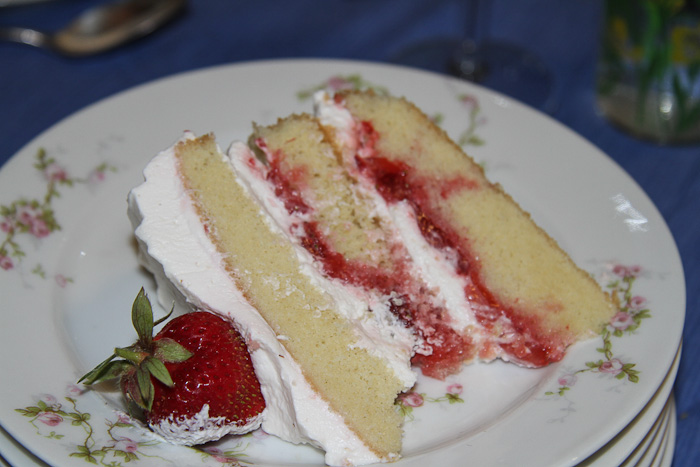
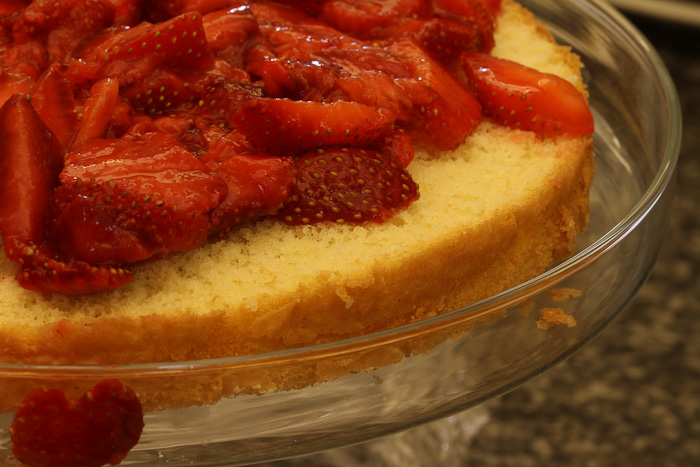
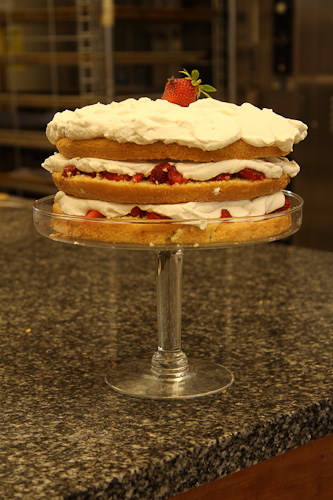
The berries in the photo came from a berry farmer about 1 mile from our house.  We picked them on the second day of the season.   The berries have had a tough year.  Early, dry, hot, and just plain mixed up.  I'm hoping that my berries will be back next year, I'd love to be able to make a whole cake with them!  The berry on the top of the strawberry cake is one of mine.

The best part of the dessert this week is that I was able to take it to dinner with good friends celebrating their 40th Anniversary! 
The recipe this week is hosted by Sophia of Sophia's Sweets and Allsion of Think, Love, Sleep, Dine.  They'll both the recipe for you.

I've said it again and again.  Simple recipes with few ingredients are some of the most difficult.  Genoise is in that group.   It's not hard, though it takes a great deal of respect for the ingredients.

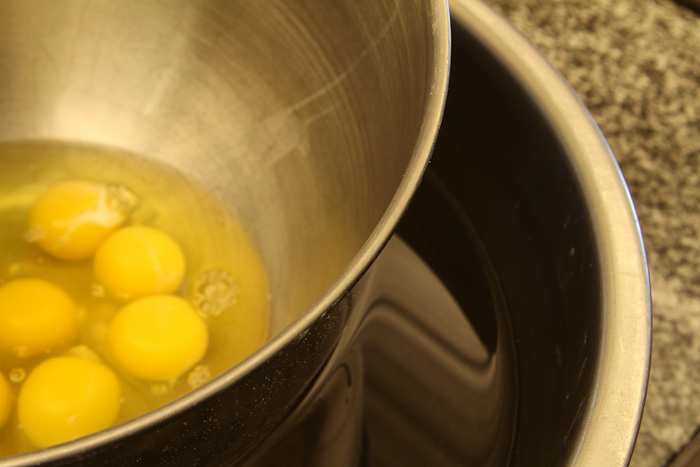
Eggs are the leavening agent in this tender cake.  They need to be at room temperature to maximize the loft from whisking.   Rather than leave them at room temperture to warm, here's a tip.   Place them in the stainless steel bowl, then place that bowl over warm water.   I like to swish them around a little bit.   Once the chill is off, you're ready to go.

img_6654-3

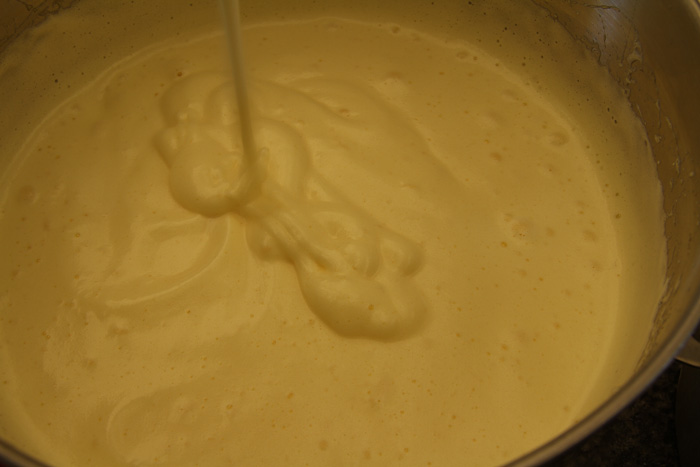
After several minutes of whisking, the eggs and sugar reach the "ribbon" state.   A gentle ribbon of the mixture will set on the surface when drizzled from the whisk.

img_6655-4

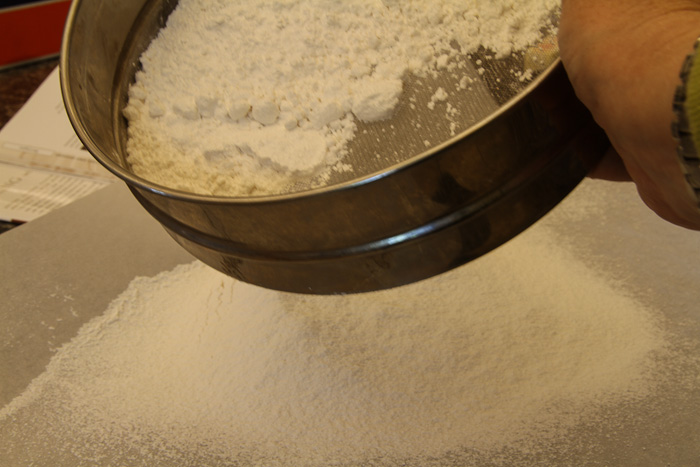
Then, the sifted flour is carefully folded into the egg/sugar mixture.  The last step, folding the melted butter into the mix.

img_6652-1

The genoise smells SO good as it bakes.  Once it's cool, top the layers  with the macerated (berries mixed with sugar), and fluffy whipped cream mixture.

img_6660-11


img_6670-5

 I decided not to frost the whole with cream, but just dollop it on the top.

img_6673-7


 img_6664-3


Lime, Honey, Beet Salad - Can't Beat It!
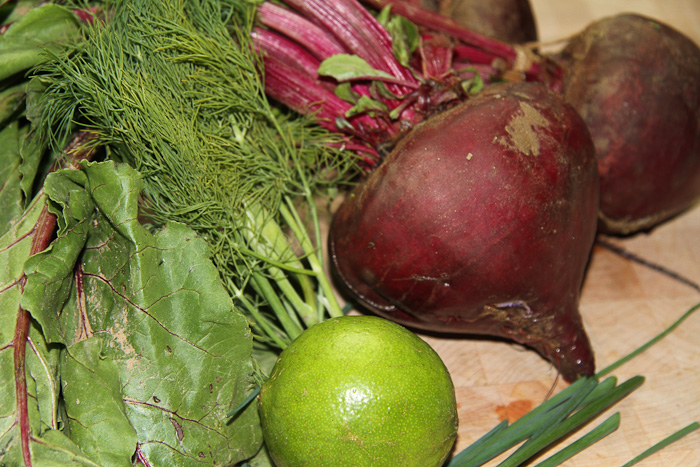
Summer's in full swing.  The corn is growing, vegetables are more plentiful at farmers' markets, and life is very busy!  Summer salads are great.   After a busy day, it's so nice to wash off the garden dirt and have a late supper.  Vegetables, and perhaps something on the grill or quickly sauteed.   You don't heat up the house, or feel too full.    Got herbs?  Here's just the recipe for a hot summer night. This week's French Friday's With Dorie recipe is Lime Honey Beet Salad.  Another one of those love it, or hate it recipes.  It's a salad worth creating the meal around.   We love beets.  And,  the ones we found at the grocery were perfect.  Earthy, deep red and ready for roasting.   It took about an hour to roast three large beets.  I quartered them, covered them with foil, and roasted at 400.


img_6679-1

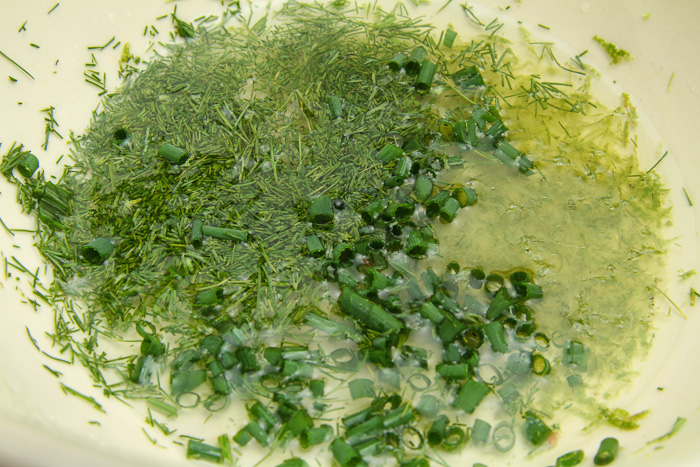
While they were roasting, I prepared the rest of the ingredients.  The green, murky dressing smells amazing!  Lime, Dill, Chive, vinegar and a little oil.   Here's the before mixing photo.

bowl-of-herbs-3


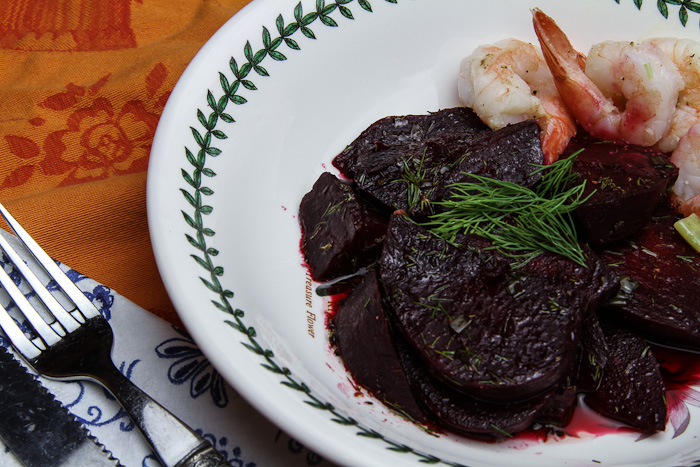
We were really hungry and the salad smelled great.   After I peeled the beets and tossed them in the dressing, they rested while I quickly sauteed the shrimp and we ate the salad just a bit warmer than room temperature.   It was delicious!  Every time we make a simple Dorie recipe that seems like "why is this going to be good?"  the recipe  always exceed our expectations.  The lime, honey and herbs are perfect with the beets.  I added garlic, cayenne and lime juice to the shrimp.  It was a great, simple combination.    This one is a recipe you'll make again and again.   I would serve this to guests anytime.   Warm in the fall with some goat cheese, and cool in the summer.


beet-lime-honey-salad-4


Strawberry Rhubarb Coffee Cake - Gluten Free!

I have a special recipe for you.   It's a gluten free coffee cake.  Can you believe it?   I generally don't seek out or try GF recipes, but I've been interested in new options for GF guests, and this one hits the jackpot.   For those of you who have been turned off by, or don't need gluten free options, please don't pass this one by.   It's really, really good and you'll never know that it's made without flour.   I've made it with strawberry/rhubarb and just strawberries.   I think you could easily toss in blueberries or other fruits more options. 

To print this recipe, click HERE

Strawberry Rhubarb Coffee Cake

Ingredients

For the Topping

8 T unsalted butter, or heart healthy butter-like stick

1 cup all-purpose gluten free flour.   (Bob's Red Mill AP version is great!)

1/2 tsp xanthan gum

1/4 cup granulated sugar

1/3 cup packed light brown sugar

1/8 tsp salt

For the Batter

3-4 stalks fresh rhubarb, cut into tiny 1/4 inch pieces

1-2 cups fresh strawberries, hulled and sliced

1  1/4 cup all purpose gluten free flour

1/2 tsp xanthan gum

3/4 tsp baking powder

1/4 tsp baking soda

1/4 tsp salt

3/4 cup granulated sugar

2 T butter - room temperature

4 T shortening

6 T  plain Greek yogurt

3 large eggs, or equivalent of egg substitute

1/2 tsp vanilla extract

Instructions

Preheat oven to 350 degrees F.  Grease and flour an 8 inch cake pan.  (round or square).  Line the bottom with parchment paper. 

Combine the topping ingredients and blend with a fork until just combined.  Place in refrigerator until needed.

For the cake batter, in a small bowl,  combine the fruits with the brown sugar, and 1/4 cup flour, stir and set aside.

In another bowl, mix the remaining flour, xanthan gum, baking powder, soda, salt and 3/4 cup granulated sugar.  By hand or with a mixer (paddle attachment for Kitchen aid)  add the butter, shortening, yogurt and mix.  Add the eggs, one at a time and mix after each addition.  Add vanilla, then fold in the fruit.  The batter will be thick.   Mix just until combined.

Scrape batter into the pan, smooth, and bake in preheated oven for 30 minutes.   After the cake has been baking about 20 minutes, remove the topping from the refrigerator, and toss/fluff with a fork to create the crumbles.  

Remove the cake from the oven, sprinkle on the topping, and return to the oven for another 20-30 minutes or until a toothpick inserted comes out clean or with just a few crumbs.  Remove from the oven and cool completely, carefully turn out of pan and remove parchment.   Then return to plate or pedestal.   Slice into squares or wedges.    Serves 8-10

Enjoy!  

Adapted from Gluten Free on a Shoestring

Tuna Lentil Lemon Salad - French Fridays with Dorie


img_6635


It's been a wonderful spring.  I know that I keep remarking on how pretty spring is, but it really, really is.  Take peonies for example.  They arrive every year, stay for about a week, and give us absolute beauty.  The smell is mesmerizing, to me.  We have a spot on our property where the original homestead log cabin once stood.  The cabin has been relocated, but the plants, trees, and shrubs that were planted by the generations who lived there remain.  There are ear trees, apple trees, lilace, lilies, and peonies.   We have to hike in to cut them.  By the time we're home, the ants have crawled out and are running up our arms.  Once in a vase, there are days of that the great smell.  Those are mine in the photo.  I love the creamy white, with the tips of pink.   Did you take peonies or lilacs to school for your teacher?  Maybe Lily of the Valley?   They were so pretty when we left home with the wet paper towel around the stems, but by the time recess rolled around, they were droopy and looking sort of pitiful.  It always meant the school year was almost over, and summer was on its way.

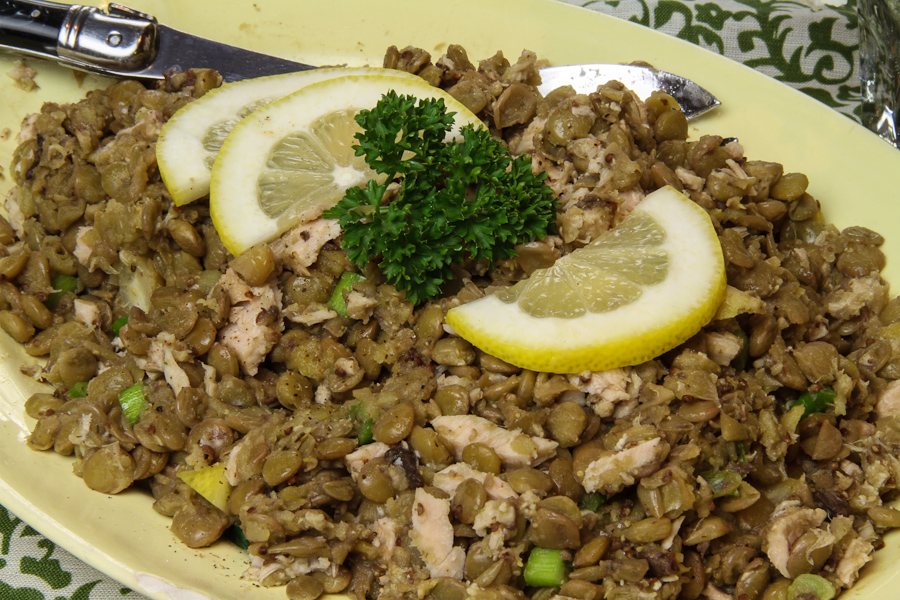
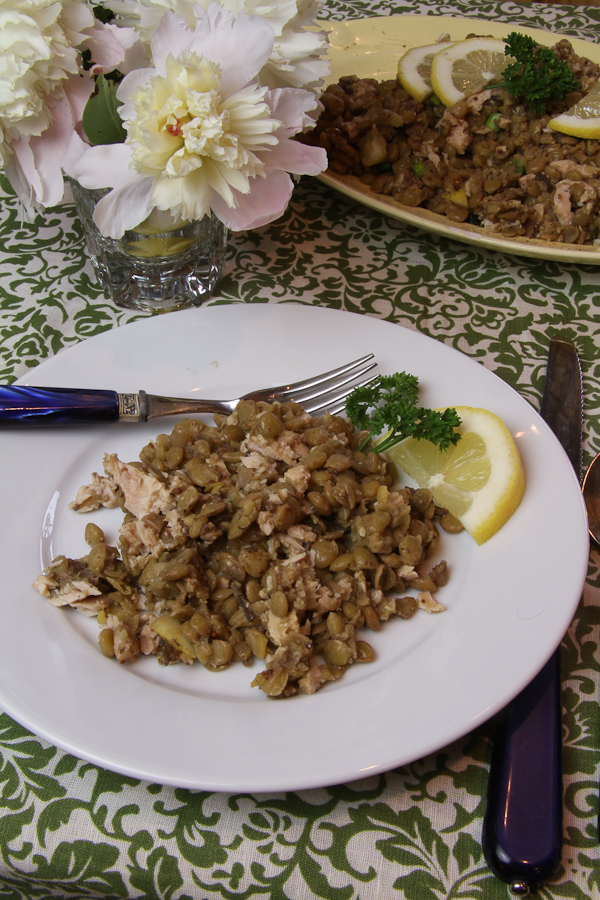
This week's Around My French Table/French Fridays with Dorie recipe is Lentil Tuna Salad with Preserved Lemon.  Very simple, light, and delicious.  I knew I may have a sales pitch ahead of me.  Gary is no fan of lentils.   He doesn't know why, just has no particular love for them.  Plus, he's a non-olive guy.   I knew if it was tapenade, we'd be ok.  Just no whole olives rolling around.

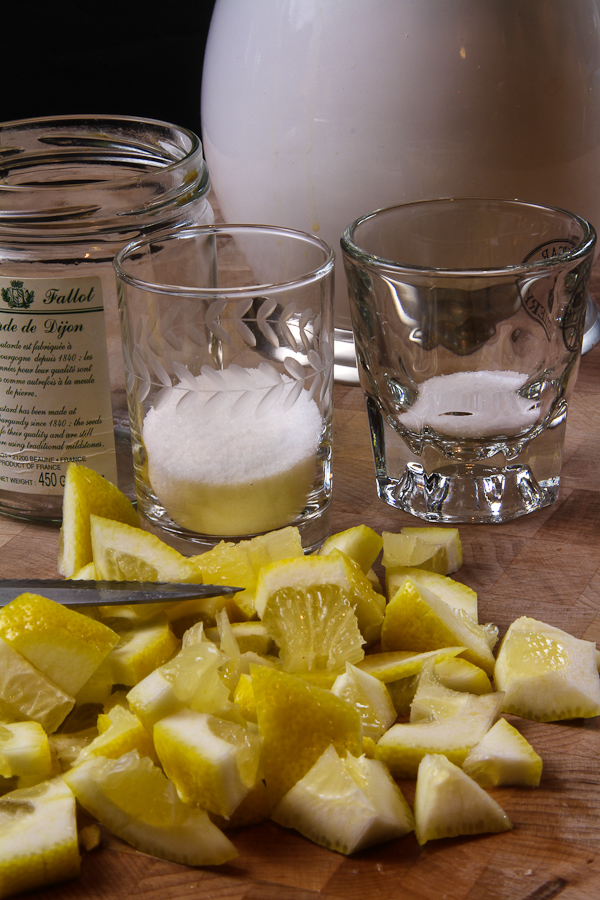
The recipe calls for preserved lemons which are very popular in Moroccan foods.   Lemon are packed in the jar with lemon juice and salt for about 4 weeks.  The skin softens and they can be sliced, diced and put in recipes.  I didn't have 4 weeks for preserve lemons, though this would be a good time to start.  I found a great "quick" preserved lemon recipe my Mark Bittman.  It took three hours intead of weeks.  I don't think they were quite as tender as the long version, but they worked well.

img_6638

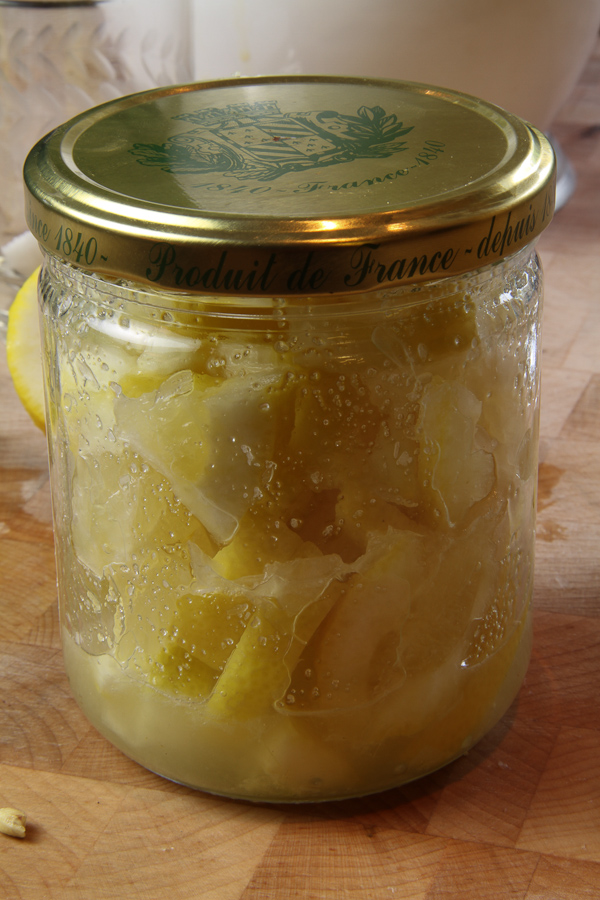
First, the lemons are chopped then combined with salt and sugar, then placed in the jar.  Shake the jar every 10-15 minutes, and in the three hours, the lemons break down and have a preserved lemon quality.

img_6639

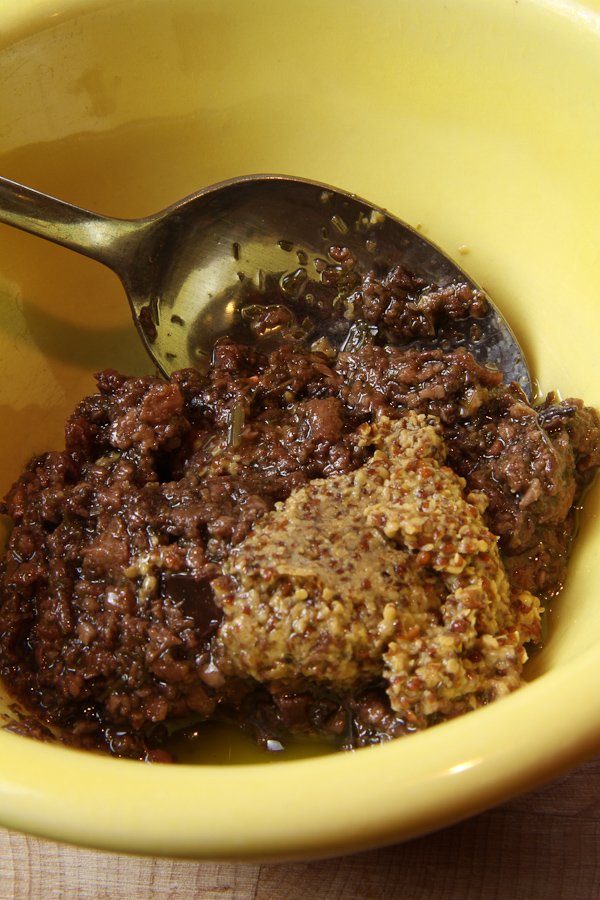
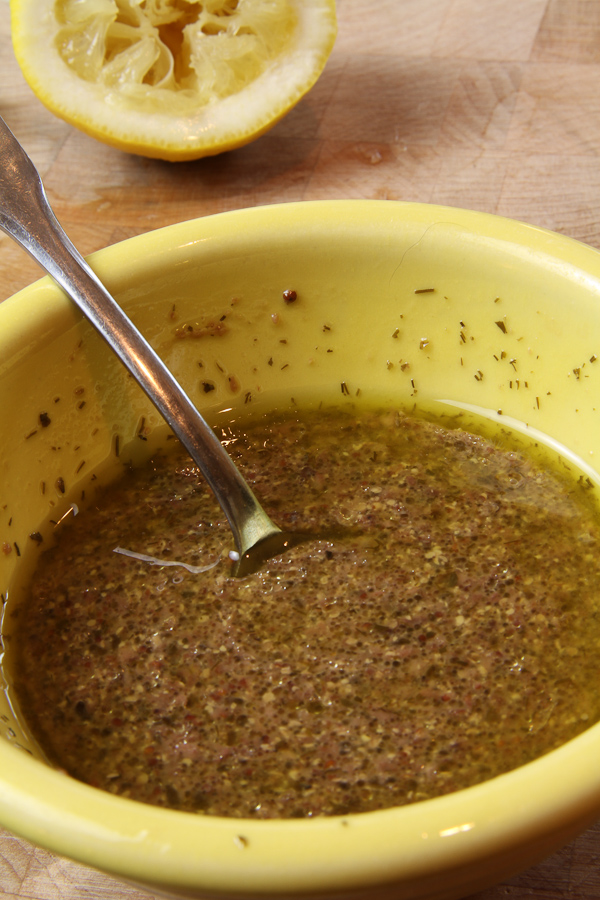
The dressing is a basic red wine vinegar vinaigrette with grainy mustard and black olive tapenade.  What a great combination!  I think this would be great to drizzle over Salade Nicoise!

img_6640

img_6641

I added the dressing to the lentils while they were warm, and they absorbed much of the liquid.  The lemons, scallion and tuna really worked well together.  I added a little just a squeeze of lemon juice to the top with the salt and pepper.   It was a nice dinner, and no complaints about the lentils.

img_6650


This recipe would be perfect for a picnic lunch on a warm summer day.  Enjoy!  Hope you can find some pretty peonies!

img_6646


Hungarian Shortbread - Baking with Julia

 This week's recipe is really fun, and very good.  If you'd like to follow along with the recipe, this week's hosts are Lynette of 1smallkitchen, and Cher of The Not So Exciting Adventures of a Dabbler.  They've got the recipe posted on each of their blogs.  

The main ingredients for the shortbread are butter, flour, sugar, eggs & salt.   Nothing strange.   It's the way the ingredients are put together that makes this really unique and  fun.   After the ingredients are combined, the dough is divided into two portions, wrapped and frozen.   When the dough is really firm, it's grated with a box grater into the pan.  Topped with jam, then the second portion is grated onto the top.  The pan is baked until golden, then topped  while still very hot with powdered sugar.  The sugar immediately melts into an icing for the shortbread.    I was so amazed with the process that I forgot to get some action shots.  There's nothing really tricky about the assembly, so you'll be a-ok.  I bet some of the other bloggers have included some process photos.

I didn't make the rhubarb jam from scratch as suggested.  I had some fig jam that looked perfect for the filling.  It was sort of a Fig Newton vision.

The shortbread is the perfect tea party sweet.  Sweet, buttery, crumbly in a cute way, and no strong flavors to interfere with a lovely cup of tea.

Speaking of tea.  I'd like to share two of my favorite teas, and their corresponding tea bags.  I know that real tea drinkers steep loose tea, but these little charmers are so cute that you'll want to use a tea bag instead.  The first one is from Fauchon.   The shop is located on Place de la Madeleine, Paris and is a destination for food lovers everywhere.  The first things you'll notice is every vegetable artistically placed, and each jar and box presented like a gift.  A trip inside, and you'll be swept away.  I refer to their tea bags as "underpants tea bags"  They're made a sheer silky fabric that you can't believe someone used just to make a tea bag.  Inside, the perfectly cut tea leaves.  This one is arome du pomme, apple tea.  it sounds strange, but it was recommended to me to try on my first visit, and has been a favorite ever since.


The other tea bag is form  Mariage Frere,  a shop in the Marais, Paris.  The tea bags are made of muslin, and also very cute.  This is the tea salon to hit after a big day of sight-seeing or shopping in Paris.  The waiters are very handsome and dressed in cream-colored linen suits.  The retail area sells beautiful tea pots and exotic tea from all over the world.   Here's a tea bag with Sur le Nil, or On the Nile.  It's an infusion tea which is very fragrant and delicious without a lot of caffeine.  You can find both teas on online and sometimes in specialty shops here in the United States.

If you're heading to Paris and would like better directions and more tips and tricks,  you can visit my Notebook.   It's got addresses and more locations for food-related travel in Paris.

I hope you'll make the shortbread, wrap it in waxed paper, tie it with a ribbon, then share it with a friend or two.   Then, brew any kind of tea and spend some time savoring the sweetness of Spring.

p.s.  Just in case you'd like help on how to brew that perfect cup of tea, a found a nice article  from the Telegraph to help.  British of course!

Lamb Navarin Printanier - FFWD

This recipe wraps up  the April collection of French Fridays With Dorie's recipes that some loved and some tolerated.   That's ok, everyone has something they're not crazy about.   Lamb Navarin Printanier is a lovely aromatic stew that is nice on a cool spring day, or a crisp autumn supper.  If you like Boeuf Bourguignon, this is for you.   But you'll have to have your wine on the side with this one. Earlier in the week, I called the local butcher and asked about the availability of lamb shoulder.  No dice.  He did have a leg of lamb that could be boned out, and cubed.   We talked about the amount, and I picked it up today.   My idea of trimmed and the butcher's idea of trimmed were very different.  I like the meat very "clean".  None of the silver skin stuff, very little fat, no icky stuff.   So I re-trimmed the meat, and ended up with quite a bit less than I had expected, but I'm sure that each bite will be good.    Here's another interesting tidbit.  In an article I found about lamb stews, the leg is not suggested because when it's braised, it can become stringy.  Yikes!   It was too late for re-do's, so I'll have to see what happens after the stew is finished.  I decided to make up for less meat with more vegetables.   I added two or three more carrots, one more turnip, and doubled the onions & potatoes.  That's just fine with me.   Most days I'd rather eat vegetables than meat anyway.  Here's the meat pre-trimming.

The recipe starts off with searing the meat.  Hmmm, I guess I forgot what lamb smells like.  Not bad, just not beef.   I didn't have to do a lot of rearranging or batches.  The meat had a nice even sear, and made lots of nice crispy fond in the bottom of the cast enamel pot.

The meat was combined with the stock, herbs and tomato paste and set to simmer.   I have a very cool item to tell all of you about.  This isn't an advertisement, and I'm not a spokesmodel, but I found something really cool, created by Michael Ruhlman.  If you make your own stock (which I usually try do, but didn't this time), and use cheesecloth to stain, here's just the ticket.  He has three reusable cloth squares that can be used to strain yogurt, stock or anything else that may need straining.  If you don't know about Michael, he's a great writer, and has several books.  The one I recommend most is Making of a Chef.  He writes about his education at the Culinary Institute of America through of the eyes of a journalist.  A great easy read.

My favorite part of the recipe was caramelizing the vegetables.  It took about 10 minutes, and they were glistening, golden and not soft as Dorie instructs in the recipe.  Here's a before and after photo of the vegetables.

We found some delicious fresh English peas in the store!  Just perfect for finishing touch.  I'm not going to serve the Navarin until tomorrow, so the peas will go in after I reheat tomorrow.  It's been awhile, but I'm going to bring it back to temp ala Sous Vide.  Using that technique, the meat won't overcook and or get rubbery like it might if I used a microwave.

The finished stew is delicious.  The  lamb tasted perfectly tender.  No stringy meat.  So go ahead, go crazy and use leg of lamb if you want to!

Happy Spring!   If you're looking for other great spring dishes, you might want to take a look at these for inspiration.

Warm Weather Pot au Feu

Bacon, Eggs and Asparagus Salad