Preserving Peaches

img_6776-2  

There are so many quotes about trying new things, making mistakes, being adventurous, etc.  so I thought I'd take that advice and try something new.  New to me.   No ski diving, or zip lining, just a new food preparation that has been around for years.  Canning!  For those of you who don't know how, please hang in there with me.   You might be able to find a big box of fruit at a market, grab a few friends, pitch in and buy the equipment, and be as thrilled as I am.   Canning is kind of like trying on Birkenstock sandals.   It seems really strange the first few times, and you skip it.  Then one day, it's the day.  Today was that day!

If you took a survey of the farm women living in this county, I bet 90% or more can fruits and vegetables each summer.  No fear.  Just good common sense and years of practice.


I've really wanted to try it.  I'm not going to make a big production out of it.  Just a few quarts of peaches.   The worst that could happen is that the jars won't seal and we'll have to eat them sooner than expected.   The best thing?  I'll have quarts of peaches at the ready, and a great deal of satisfaction.

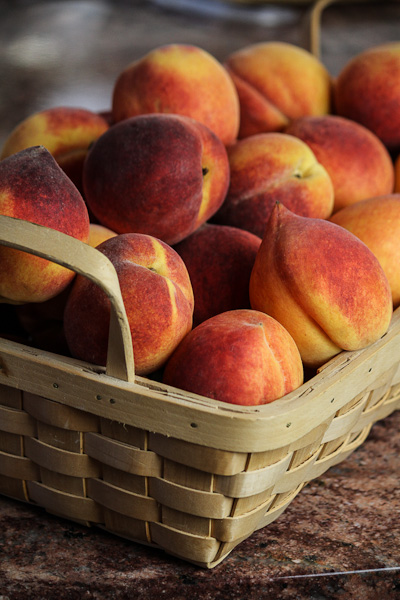
Last Tuesday, I got a big box of peaches from a truck driving through from Georgia.  My friend waited in a  line of about 100 people also in pursuit of the wonderful fruit.  They ripened perfectly.   I made peach tarts for the Farmers' Market, ate serveral peaches, gave peaches away, and still had a worrisome amount I feared might spoil.  Peach pie?  Sure, then what?   Canning seemed like a great idea.  I know that canned peaches don't sound glamourous, but they won't be stringy, squishy or mushy.  Promise.

We've canned applesauce and pickles, but never peaches.  Enter the internet. I found a great preserving/canning site and read the specs for peaches. I had every thing on hand, plus the time.

First, gather the cast of characters needed for all canning jobs.

1.  Giant Canning pot (cheap, can double as party ice bucket, apple bobbing, felting... you get it.)

2.  Jars.  Classic Ball jars - I choose wide mouth

3.  Rings and Lids (always use new lids, they don't get re-used)

4.  Lots of clean towels, and all of your burners on the stove.

5.  Tongs and Jar Grabber

img_6775-1

The Jars, Lids, and Rings can be found in almost any grocery/hardware store.

img_6782-8

And for those of you who need a little more specifics, here is a jar, a ring and a lid.

img_6785-11

This is kind of like rubbing your stomach and patting your head.  Lots to do all at once.

First, get the jars clean.  Run them through your dishwasher, or bring them to a boil/simmer for about 10 minutes upside down in a stock pot of water.  Lift them out, and let them, turn right side up.  The air will dry them quickly.

Second, fill the big pot with warm water and begin bringing it to a simmer.  Start another small saucepan simmering with the lids and rings.

Now, start the syrup.  I made a lighter syrup.   2 cups of sugar for every 1 quart of water.  Bring the sugar and water to a boil, then keep warm.

We haven't even touched the peaches yet!

Once all the jar are clean, and the lids and rings are ready, take about 6 peaches, and gently drop them into boiling water for about 30 seconds.  Using a slotted spoon or skimmer, lift from the water and place in cold water.  The skins will slip right off.   I decided to can peach halves for more flexibility later.   If you slice along the dent/fold in the peach and follow all the way around, the peach will easily separate from the pit.   That part was the most fun.

Place the peach halves pit side down in the jar. Give them a push to make sure they're tight.  Pack to just below the neck of the jar.  Fill the jar with the syrup, to withing 1/2 inch of the top.  Try to be exact for this part.   Using a butter knife, slide it up and down the side of the jar, to encourage any air bubbles to float to the top.   Clean the rim of the jar with a clean paper towel, then with tongs, take a lid from the simmering water and place it on the jar.  Then a ring,  but not too tight.

Your pot should have a stand, or rack inside to make sure water can circulate completely around the jars.  Set jar one the warm water, and repeat with the remaining peaches and jars.  If you prepare to many peaches at once, you risk them turning brown.   It's ok to use lemon juice or pectin, but I didn't.

When you have all the jars ready, add more water to the pot so the jars are covered by at least an inch of water.  Bring the water to a rolling boil.  Start timing when it's a rolling boil.  I live in about 875 feet above sea level so my processing time was 35 minutes.

Processing Times, Tips and Trouble Shooting

Once the processing is complete, carefully remove the jars to a towel and allow them to cool undisturbed until cool.  While they're cooling you'll hear the jars seal with little (or not so little) pops.   Any jars that don't seal should be placed in the refrigerator and eaten within a few days.

I heard four pops from four jars.

img_6792-14

 I can't wait to pop open a jar (pun intended), and try the peached with some ice cream, or an old-fashioned favorite, cottage cheese.   I still have 12 peaches left who I'm sure will be a pie very soon.

Try something new today!


Baking with Julia: Rugelach... Divine!


This week's Baking with Julia recipe is Rugelach.  A lovely pastry cookie filled with apricot lekvar, dried fruits and nuts.   I've made Julia's lekvar several times for wedding cake filling.   It's so good!   And simple.   Cooked dried apricots with brown sugar, and almonds.  All pureed into the spreadable paste.   The lekvar is spread on the cream cheese pastry dough, topped with nuts and more dried fruit, then rolled and baked.    Simple, not too sweet and so pretty. The dough is made in the mixer.  Emergency subject change and news flash.  My first Kitchen Aid mixer is broken.  I was making many, many croissants, and used the paddle to work together the detrempe.   On the last batch... snap.    All motor, no action.  I have another mixer, but that  was the first one I bought for the bakery and she'll be off to the repair shop for a quick repair.  It's funny, that little mixer always seemed a little more fragile than the others.   Today, I'm working in the house with the mixer that gets the least amount of use.   We should be in good hands.

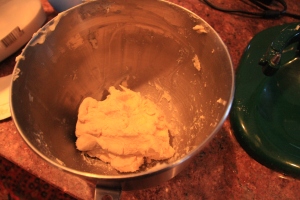
Back to the dough.  The dough is made with cream cheese.  It works together beautifully and is very soft and easy to work with.   Since the dough is going to be rolled into a rectangle, it's always a good idea to shape the dough into that shape before chilling.   So pretty!

I really like apricots and prunes.  For this recipe's lekvar, I used about 2 cups of apricots and a few prunes for color and taste.  The almonds were toasted, slivered and worked really well.  I really like the color of the finished product.  It tastes and smells SO good!

The recipe for the Rugelach requires lots of prep in little bowls.   Nothing too fussy, but you need to make sure you'll all set before you start to fill the dough.  This is kind of an ugly photo, but wanted to show all the components set to go.

The rolls chilled for four hours, and then were egg washed, cut and rolled and a delightful nut, sugar, cinnamon combo.   I wasn't planning to stay up late and wait to bake them, but I'm in for the long haul with this recipe.   There must be something good on TV!

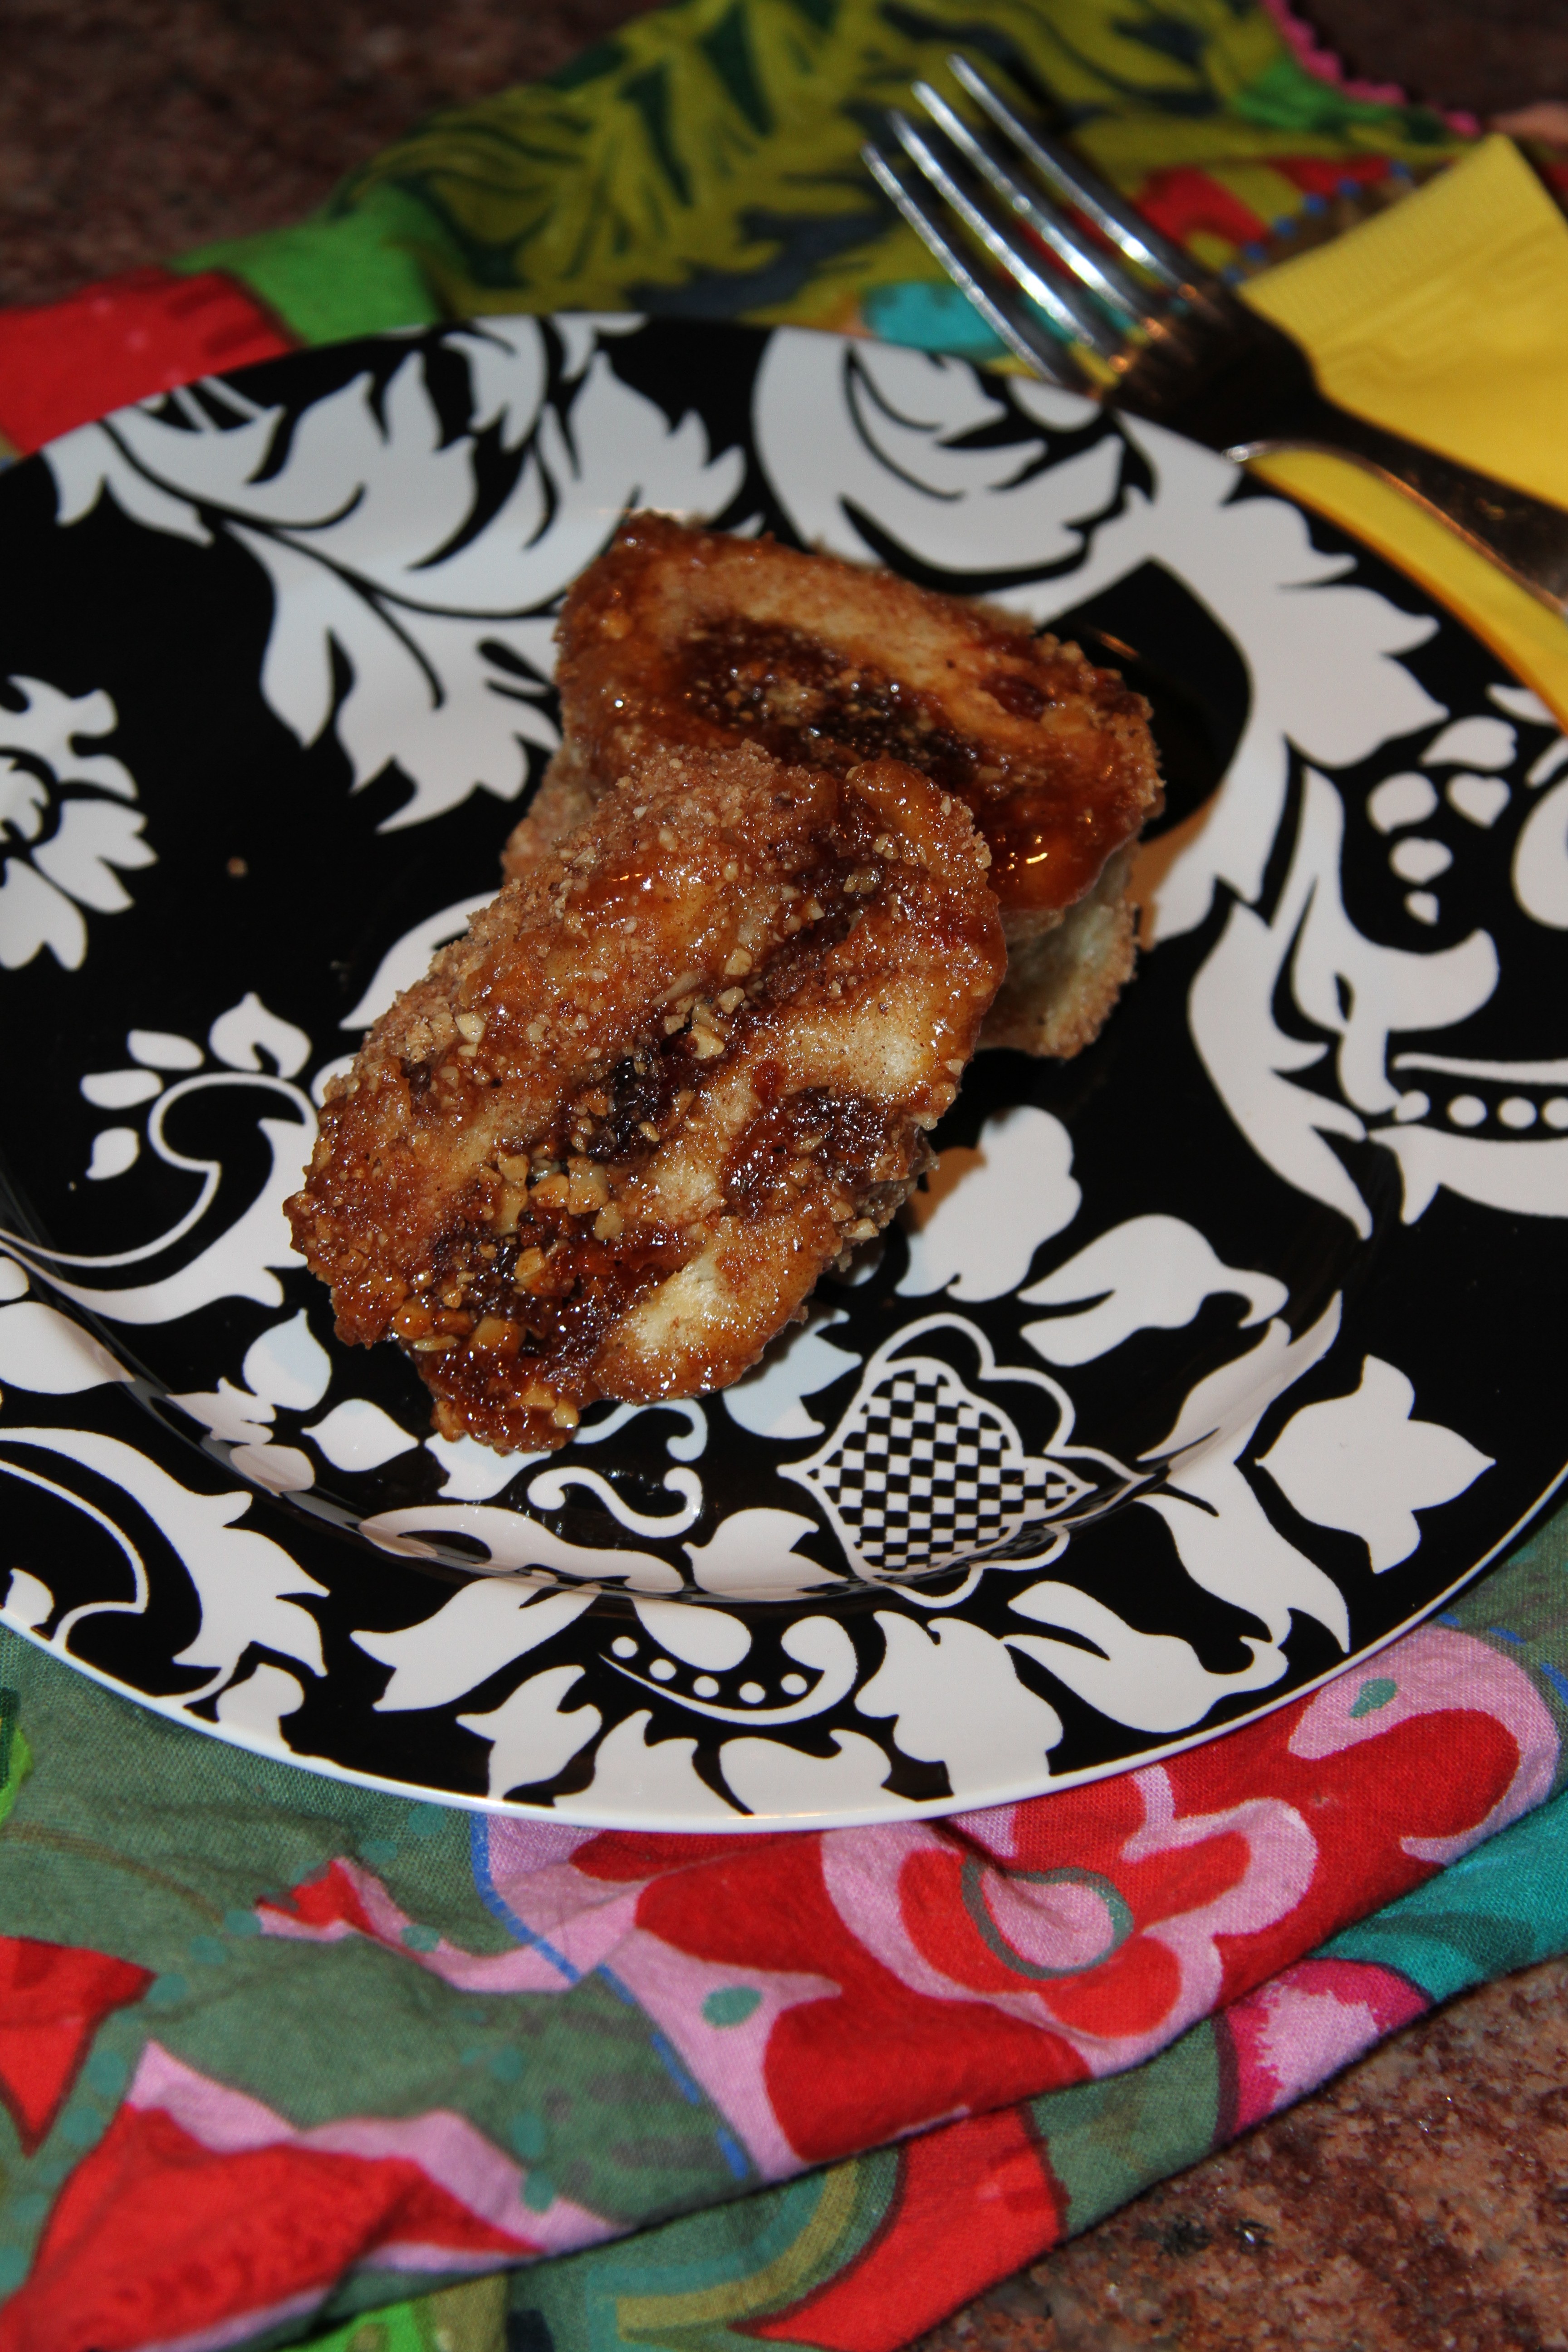
We really liked the recipe.  I'm not positive that they were completely done, but they were nicely caramelized and had been in the oven for 30 minutes.   The dough was still tender and soft, I was expecting a little crunchier.   The fruit and nuts were really good.

Just click the link to read more entries for Rugelach on the Baking with Julia  website.  In two weeks we'll be making Irish Soda Bread!  Another great recipe.  if you're looking the the recipes, the host each week will add the recipe to their post.  It should be one of the first posts of the group.  Anyone can join the fun.  Pick up a copy of the book and start to blog!

Nutella Tartine - You Never Forget Your First Taste

Just like you never forget your first kiss, you never forget your first taste of Nutella.

My first bite was in a Nutella crepe in Paris.  The warm chocolate hazelnut spread is heavenly, and just a bite or two is so satisfying.

This week's French Friday's with Dorie is a Nutella Tartine.    A tartine is a toasted open-faced sandwich.   Ingredients can include pesto, arugula, tuna, tapenade, goat cheese.... you get it.

The Nutella tartine uses toasted brioche, orange marmalade, Nutella and sliced almonds.    I perfect Sunday morning (or Valentine's Day...) breakfast.

I decided to combine my Tuesday Baking with Julia white loaf bread with this recipe.   The bread is sturdy, with just the perfect amount of sweetness.

Nutella is a treasure, but there are a few treasures I'd like to introduce.  The first is the Breville Toaster Oven.  Dreamy!  It toasts, broils, bakes, everything perfectly.  It takes up no more room than a microwave.  It's a new best friend.   If you're in the market for a new toaster, pick up one of these instead.   I toasted the bread in the Breville, and buttered it with the next treasure... 

Sweet cultured butter.  I found an Irish brand at our cheese store.   The butter is so good, you can almost eat it alone.  You shouldn't skip buttering  the bread.  If you can't find fancy-schmancy butter, find some good salted butter.  This is one time when salted butter is important.  It will balance the sweetness of the jam and Nutella.  You can also make butter.  What?!? Make butter?  Yep.  It's so easy and delicious.  Here's how:

To Make Your Own Butter:

Pour 1 quart heavy cream into the bowl of a stand mixer fitter with the PADDLE.   Mix on medium speed for several minutes. (about 10).  The cream will go through the whipped cream phase, then become light yellow, and separate into butter and buttermilk.   You'll see the butter separate out, and hear the clunking in the mixer.

Remove the butter mass from the bowl, and scrape off any butter on the paddle.  Place the butter between sheets of parchment paper, or plasic wrap and knead the butter to remove any remaining pockets of buttermilk.  The buttermilk will sour, and taint the taste of the butter, so take time to make sure the butter is solid without liquid.    Then knead sea salt or salt and herbs into the butter to taste.  Start with about 1/2 tsp, and increase.  If you have a box of food service gloves, they come in handy for kneading the butter.

Form into a log, about 2 inches in diameter, and about 6 inches long.   Wrap in parchment paper, plastic wrap or waxed paper.   Chill (or use right away).  The butter will keep a few days in the refrigerator.

Back to the Tartine!

After the bread is toasted, it's spread with butter and orange marmalade and drizzeled with Nutella.   The toasted sliced almonds add great texture and crunch.   I like to cut the bread into slices, or on the diagonal.   This would also be great on a baguette.  If you're not an oranage marmalade fan, you could substitute your favorite jam.   Simply, sweet and so lovely.   We loved the tart orange taste with the sweet Nutella.   We'll be making these again!

Have a great weekend! Coming up... Chocolate Truffle Tartlets

Let the Good Times Roll! Jambalaya with New Orleans Sauce

It's almost February and I'm in the mood for spicy, New Orleans food.  Mardi Gras is only a few weeks away so I'd like to share my recipe for Jambalaya.   I've been making this recipe since 1988.  It's evolved over the years.  The original recipe was  in one of Paul Prudhomme's books.  The best part is that you can add shrimp, sausage, chicken or any combination depending on what you have available.  I've found that for the sausage, a good fully cooked kielbasa or butcher shop wiener is great. Serve the Jambalaya with or without the sauce.  I like to make the jambalaya spicy, and quiet the heat with the sauce.

Let's face it, it's January in Wisconsin.  Tomatoes are ... well, to keep it polite.  They're pale and not the vine ripened beauties we see in summer.   I've created a recipe that uses canned tomatoes.   Tomatoes picked at produced in their peak.  The brand I use is Organic, and whose cans are (or will be very soon) BPA free.   The spices are dried, and the rest of the ingredients are very easy to find.

Every Creole or Cajun recipe uses the vegetable trinity of onion, celery, and green pepper.  Chop them in equal sized pieces, and in equal parts.   Since you'll be making both recipes, you can do your chopping all at once.   Don't worry if you don't measure exactly, just try to be close to equal parts.

I love the sight of vegetables all chopped and ready to go.  Here are the triplets, ready for the heat.

The spice mix is the perfect balance and heat and flavor.
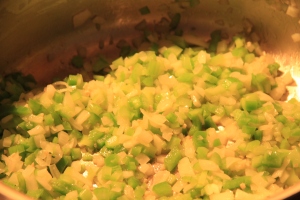
The onions should begin to look translucent.

Once you've cooked the vegetables, turn up the heat and add the chicken and stir in the seasoning mix.  At  this point, you'll know you're able to make the best meal ever!  You'll smell the spices and know it's pure New Orleans.

Add the stock, tomatoes with puree, and rice, then crimp foil around pan and place in the oven.  NO PEEKING!   You may want to move the mixture to a small baking dish, then cover with foil if you're having trouble getting a good seal.  Relax, have little libation and start the sauce.

I like to think of the sauce as a nice way to use the leftover vegetables, and spices.  The spice mix is just a little different, and somewhat sweeter.

This time you're going to use butter.  Melt the butter, and add the onion, green pepper and celery.  Add the spice mix, and stir to combine.  Add about 2/3 of the can of tomatoes, and the stock.  Add a few dashes of Tabasco and a few pinches of sugar.  Simmer while the jambalaya is cooking.  The picture below is the Jambalaya just after the foil came off.

You'll want to gently toss/fold the Jambalaya after you remove the foil and the bay leaves.  The tomatoes will be at the surface.  This will gently mix them together.  Be sure to taste the rice to be sure it's completely cooked through.  Sometimes I've needed to add more stock and place it back in the oven.  This is due to the type of rice and the amount that it requires.  Can you smell it yet?  The  sauce is delicious!  Use it with other dishes too.  It's great with eggs with spicy sausage.

To serve, I mound the Jambalaya in a flat soup bowl, and top with the  sauce and chopped scallions if desired.   Serve with a great crusty roll.  The recipe will serve 4-6 people.

Jambalaya with New Orleans Sauce

Spice Mix

2 bay leaves

1  1/2 tsp salt

1 tsp white pepper

1- 1  1/2 tsp cayenne pepper

3/4 tsp thyme leaves

1  1 /2 tsp  dried oregano leaves

Ingredients:

2 T. olive oil or solid fat

1 1/2 cup chopped onions (about 1 medium onion)

1 cup chopped celery (about 3 stalks)

1  cup green pepper, chopped ( about 1 medium)

1 cloves garlic, chopped

2 uncooked  boneless, skinless chicken breasts, cut into 3/4 inch pieces

1-2 kielbasa, sliced diagonally (if desired)  fully cooked

1- 2 pounds cooked shrimp (you can use any amount)

2 cups chicken stock

1 can (28 oz.) diced tomatoes in puree

2 cups uncooked rice

Preheat your oven to 350 degrees F.  Heat the oil in a stock pot or large saucepan.  Add the onion, celery and green pepper and cook over medium heat until the onion is becoming clear.  Turn up the heat and add the chicken.  Cook about 3 minutes, stirring to toss the vegetables and the chicken.  Add the seasoning mix, and cook about 2 more minutes.  Add the garlic.    When the chicken is white, and appears cooked through, add the tomatoes and the chicken stock.  Bring to a boil, then add the rice.   Heat though, add shrimp and and sausage.   Transfer the mixture to a baking pan.  A deep 8x8 or 13x 9 will work depending on how much meat you're added.   Seal the top with foil and place in the oven for 30-45  minutes.  The rice should be soft, not crunchy and the liquid mostly absorbed.  If you prefer the rice softer, the mixture can remain in the oven longer.

For the sauce:

Spice Mix

2 bay leaves

3/4 tsp dried oregano leaves

1/2 tsp salt

1/2 tsp cayenne pepper

1/2 tsp paprika

1/2 tsp black pepper

1 /2 dried thyme leaves

1 /2 tsp dried basil leaves

Ingredients:

4 T butter

1 can diced tomatoes in puree

3/4 cup chopped onion

3/4 cup chopped celery

3/4 cup chopped green pepper

2 cloves garlic, chopped

1  1/2 cups chicken stock

1 tsp granulated sugar or honey

2-3 dashes Tabasco Sauce

In a large saucepan, melt the butter, add the onion, celery, and green pepper and cook until the onion begins to look clear.  Add the spice mix and stir to combine.  Stir in the stock and tomatoes.  Bring to a boil, add the sugar/honey and Tabasco.  Reduce heat and simmer uncovered while the jambalaya cooks, about 30-45 minutes.  The mixture will reduce and thicken.  If it becomes too thick, add chicken broth.   Be sure to remove the bay leaves before serving.

This recipe will make about 2 1/2 - 3 cups.

Baking with Julia will start February 7th

I'm thrilled to announce that  starting 2/7/12, I'll baking along with Dorie Greenspan's group, Baking with Julia.  We'll bake two recipes per month.  I'll keep you posted with the recipes that have selected.  Our first recipe will be bread!  Lots of tips, ideas and photos.  If you're interested, pick up a copy and bake along with me.   Post your comments, questions and results.

So Simple and So Delicious! Warm Weather Pot-au-Feu

This week's recipe is Warm Weather Vegetable Pot-au-Feu.  For those of you who aren't familiar with pot-au-feu, it's a hearty cold weather feast of meats and winter vegetables simmered for hours.  Literally, it means pot in the fire.  Warm, lovely comfort food.  Something lovely simmering on the stove when you stumble upon that sweet French farmhouse.

The warm weather version was equally delicious, quick and easy to make and has all the charm of it's winter version.   I really like leeks and was looking forward to preparing them.   Gary found great produce which made the mise en place extra fun. He even found "slender carrots" as specified in the recipe.  Here's a picture of the the vegetables ready for the pot.

This recipe goes so quickly!  Only a short boil/simmer and the meal was ready.   Our friend, Grant, taught Gary how to poach perfect eggs during a vacation to New Zealand.  Since then, Gary's been the official egg poacher of the house.  No need for cups, or special pans.  Just a little vinegar into simmering water.  I really wanted to try poaching the eggs myself to see how good my observations had been.  The eggs went really well.  I spooned the pot au feu into the bowls, and the eggs were ready.

We were both very surprised at how delicious this recipe was. It looks so simple, but the flavors are so good.   Dorie did a great job with the timing and directions.  Each vegetable was perfectly cooked, including the spinach.  I used vegetable broth, and didn't use any lemongrass. The dish is light yet hearty, and SO good.  The egg stirred into the broth adds body and nice flavor.  I think I'll add some chopped chives to the top next time.   
For some reason, I can't get the finished photo of the recipe to rotate.  Here's the dish, steaming hot, poached egg and all!    One more update before I close.  The wheat is up!  It's been a month.  It's about 10 inches high, and looking healthly and strong.  I'll include a picture next week. 

Cheers!


Salted Butter Breakups - FFWD

Salted Butter Breakups- French Friday with Dorie

After a few savory weeks, it's fun to get back to something sweet.  I read through the recipe and realized I had learned to make cookies very similar to this on my very first day of pastry school.  We used the recipe to learn how to weigh ingredients and smear dough across the marble to shear the butter between layers of flour.  I was going to use that technique then decided to follow Dorie's directions and compare.    The instructions produced a very flaky, smooth and perfect dough. 

The buttery, salty, and sweet cookie was fun to make and eat.  I especially liked the large breakable, shareable size and shape.  I would highly recommend trying this recipe.  

Here's the dough as it's ready for chilling.   The recipe used the food processor which made it quick and easy.

After the dough was rolled out, I brushed it with egg wash, then scored the top.  This is the same pattern as the Bretton cookie from  France.  I added a little extra Fleur de Sel to the top just before I put it in the oven.  It brought out even more of the great salty taste.

Here's the finished Break-up.  Perfect with a cup of tea.  This was a huge hit with Gary!
Next week:  Orange Caramel Scallops!   Have a great week!

Beggar's Linguine- French Fridays with Dorie

Well, it's been a wild week.   Politics, weather, Stephanie's biathlon, family illness ... and earthquakes.   Fortunately, this week's recipe was quick, easy and surprisingly delightful.  

I have to admit it wasn't a recipe I would have read and decided to make.   Fruit, nuts and pasta don't naturally pop into my mind for a combination.   The recipe uses the main ingredients of Mendiant, a French chocolate confection, for inspiration.   I made Mendiants at Le Cordon Bleu, and again at the French Culinary Institutes's Chocolate class.   A Mediant is a disk of tempered chocolate about the size of a quarter topped with a pistachio, a dried cherry or other dried fruit, and an almond or hazelnut.  The disk it to look the medallion a nun would wear.  The confection is simple and delicious.   Beggar's Linguine uses the same ingredients but uses pasta rather than chocolate.  Browned butter adds a nutty and background for the pasta.

The ingredients are very simple.  pasta, butter, dried fruits and nuts.  I substituted dates for figs, and raisins for golden raisins.  Otherwise, I followed the recipe as written.  (Be sure to pick up a copy of the book if you haven't already.)

Two ingredients in the recipe are favorites.  Browned butter and chives.  I love making browned butter.  I love the smell, the technique, and the taste.  This was no exception.  The recipe puts the nut and fruit into the butter early in the browning process.   My instincts were to wait, but I added them as directed.   In retrospect,  I should have waited just a little more.  The fruit ended up caramelizing a little bit and appeared, but didnt' taste, a little too dark.  Garnishing with fresh chives, orange zest, and fresh Parmesan made the dish complete.

Beggar's Linguine would be a great accompaniment for grilled lobster or pork tenderloin.   We enjoyed the dish.  I'm planning to try it again, waiting until the butter is brown to add the fruits.  I'd also add a little more chive and orange zest. 

If you're looking for a dish that's interesting, rich and unique, give Beggar's Linguine a try.

Next week... Salted Butter Breakups!

Basque Potato Tortilla - First French Friday with Dorie

It's delicious!  You would think one week before Valentine's Day, and with a chocolate event tonight, I'd be thinking about chocolate.   What a great way to start the day!

This is my first French Friday with Dorie post.  This week's recipe is Basque Potato Tortilla.  Don't let the tortilla part fool you.   It's a lovely room temperature omelet-like bruch recipe.   

I started the recipe early this morning to surprise Gary as he woke up.   The potatoes, garlic and onion smelled great as they melded together on the stove top.   I noted that the recipe called for room temperature eggs.  As a pastry chef, I know that a note like that can mean a big difference in the outcome.   I'm including a photo of the eggs in a stainless bowl, set over a bowl of warm water to bring them quickly to room temperature.  A little trick of the trade. 

Rosemary was an option.  I decided to use a little thyme instead of rosemary.   After the vegetables were complete I had a big decision.  Stainless cookware or non-stick?    Dorie mentioned using cast iron.  While I have a cast iron pan, I was way too chicken to make eggs on that surface.  Both skillets were out on the counter.   The non-stick was a sure thing, the stainless... hmmmm.    Ok, I wimped out and went with the non-stick.   It's a new pan with a diamond coating that makes cooking eggs a dream.   I promise to go back and try the recipe with the other surfaces.   This morning I wanted things to go smoothly.

I mixed the vegetables, eggs and herbs and followed the timing exactly.   The eggs puffed beautifully and were ready for the broiler. 

 Within a minute, the top was browned and the whole tortila slid easily on to the platter.   Success!

After about 45 minutes, I tasted the tortilla.   I really like quiche at room temperature.  The eggs and flavor of the herbs really comes out.  This was no execption.  The eggs were smooth, and potatoes, soft but not squishy.   With a salad and fruit, his will make the perfect winter day brunch.  

See you next Friday!  Now back to the world of chocolate...