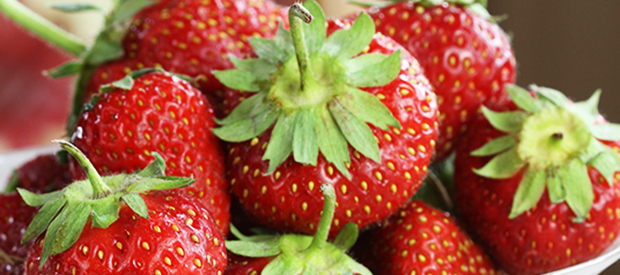
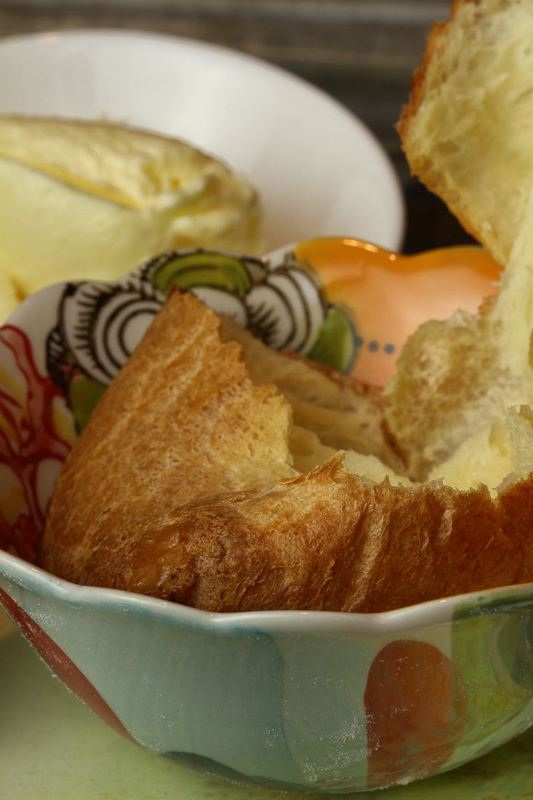
It’s Strawberry time! Here’s a shortcake recipe sure to please.
Read moreConfetti Angel Food Cake with Fluffy Icing
Angel food cake is a favorite of many! Learn to make this delightful cake from scratch. Take the free class for creating perfect fluffy angel food cake frosting.
Read moreKick Off to the Holiday Season
It’s the kick off to the holidays! Here’s a cookies recipe and my holiday giving ideas list.
Read moreFrench Macarons
Are you ready to tackle French Macarons? Here's my recipe and some tips & tricks.
Read moreLemon Ricotta Pancakes with Blueberries
Lemon and Blueberries go so well together. Make this for a delicious Spring brunch.
Read moreThanksgiving with all the Trimmings
Thanksgiving is approaching and it's time to gather recipes for your dinner. I've created a Brandy & Cranberry dressing using Jones Dairy Farm All Natural Pork Roll. I love making Thanksgiving dinner. There has been a few disasters over the years, but they've made great memories. What are your favorite memories?
Read moreButter, Let's Make It!
Living here in the Dairy State, we have all kinds of dairy events. June is dairy month, and events are happening all over. Cows on the Concourse brings cows to the Capital square in Madison. Each county has a dairy breakfast where a farm is featured and breakfast is served to hundreds of visitors. Today I'm making butter. Make from the best organic heavy cream. It's easy and so delicious!
Read moreCroissants and Pain au Chocolat
What could be better than make from scratch flaky, delicious croissants and pain au chocolat. This is one of my very favorite classes to teach. Here's the recipe for making your very own French vienoiserie at home.
What could be better than using three sticks of butter and pounding it into a cute little square!
Read moreBirthday Week
It's Birthday Week!
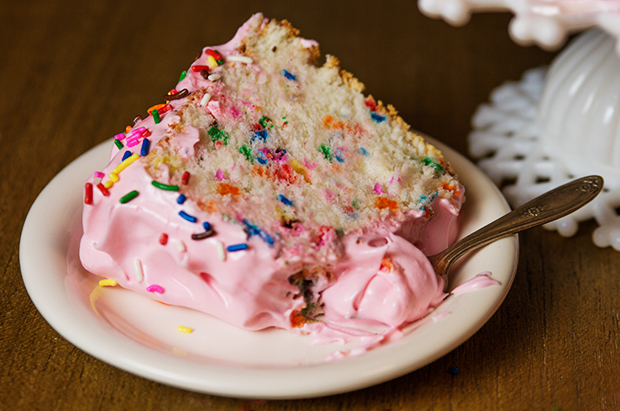
Warm winter wishes from Wisconsin! It's -10 degrees as I write this post. The sun is shining, the birds are chirping away at the feeders and it's cold, really cold! But enough about the weather. It's been awhile since I've written a post. It was late November to be exact. I'm not sure why it's taken me so long, but I'm back and feeling really energized and ready for the new year. I know it's almost February but it's a new year for me.
You see, this is my birthday week. I don't know about you, but I like to look back on the year's events and changes, then look ahead to the new year with goals, aspirations and plans.
What a year it was. Here's the quick recap. In February, I lost my mom to complications of MS. It's a loss no one can prepare you for. Then in April, my dad moved in with us. Another change, and one I won't trade for anything. He's a wonderful additional to our household. An avid gardener and golfer, he's got a contagious joy for life. Later in April, Skyhouse Publishing offered me the book contract and I spent the rest of the year writing, testing, and photography the recipes for my book. (I don't have an exact release date yet, but it will be sometime in September 2014. I promise to keep you posted.)
The year was sprinkled with travel and the pleasure of meeting many new friends. In September, I traveled to Ireland to participate in Angela Ritchie's ACE Camp to learn more about photography and food styling from Beatrice Peltre. Gary, my dad and I made a trip to Las Vegas early this month. And, I've just returned from Salt Lake City where I attended ALT Summit.
What's that, you ask? It's a conference for the blogging community filled with workshops, parties and the opportunity to learn more about this crazy blogging world and social media. I have to admit, I was very nervous. World famous lifestyle, fashion, and craft/DIY bloggers? The experts on nail polish, hair, shoes and just the perfect outfit? Yikes! As it turned out, it was a wonderful group of mostly women. They were kind, intelligent, generous and enthusiastic about the internet blogging world.
One of the highlights was a dinner hosted by one of the sponsors Gygi. It's a family owned SLC kitchen/restaurant supply store with a beautiful space for cooking classes. Kelsey Nixon, from the Food Network and Cooking Channel lead us through a few of her recipes. She has a new book, and the recipes are great. In the photo below, it looks like we're the same height. I'm actually crouching down about 12 inches! She's tiny and just as lovely in person as her TV persona. The kitchen was decorated in a birthday party theme (perfect for me!).
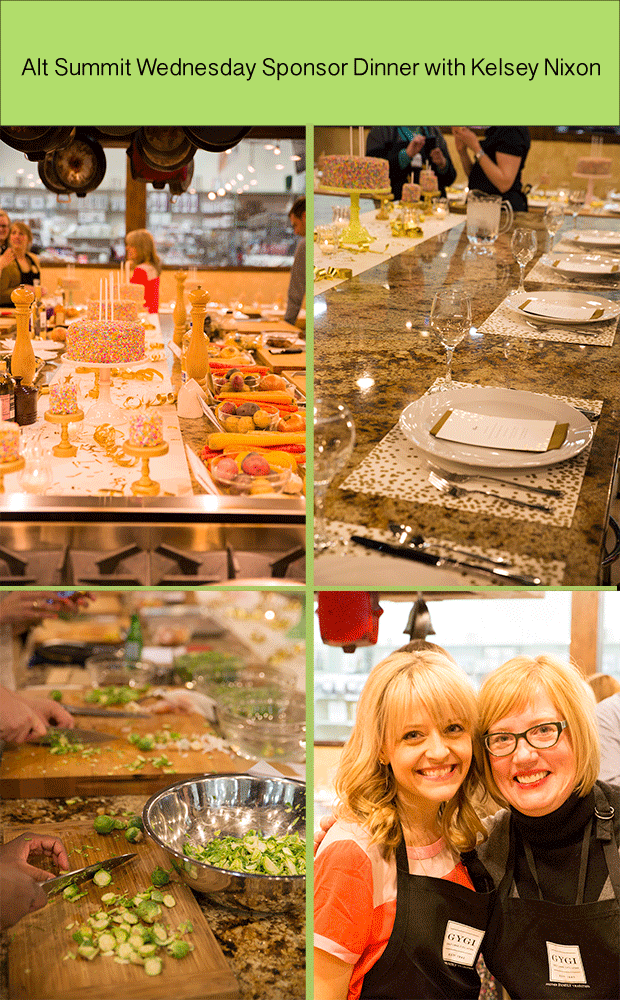
As you can see in the photo above, we made a Brussels Sprouts side dish. It included maple syrup and pecans. It was one of my favorite parts of the meal. If you've interested in her book, you can find it on Amazon, or your favorite source.
To view to recipe online, you can find it here on Scribd.
What's new for my next year? Book editing and release, and more frequent and diverse blog posts. If you've made it this far, I'd like to ask a favor. What you would like to see in my posts? Any recipes or topics you're looking to learn more about? Just leave a comment and let me know. I'm trying to add more posts to my Pinterest boards, and Little French Bakery Facebook page. I hope you'll check them out and follow along.
Last year I posted my Confetti Angel Food Cake Recipe on my birthday. If you're looking to celebrate with a fun cake, I think you'll enjoy the recipe.
Thank you for your support over the last year, and here's to the next chapter!
Paris Cookware Shops
Where do I purchase my equipment? Many pieces come form Paris. Here's where to shop in the City of Light.
Read moreIce Cream Cone Cupcakes
It's just after July 4th, and we're in the full swing of summer. Our days are hot, long and fun. I don't know about you, but our grill is barely getting a chance to cool down between uses. My new favorite cologne is a mixture of sunscreen and bug spray. Our garden flowers are growing by leaps and bounds. It's such a nice time of year! Over the July 4th holiday, I made some treats perfect for a silly summer day. Ice cream cone cupcakes. I don't know where she learned about them, but my mom made these for us for as long as I can remember. Who knows? Maybe she invented them!
She'd stand the cones up in an 9 x 13 pan, fill them with batter, bake and frost.
They're the perfect eat-it-all snack. Kind of goofy, and very easy.
I needed someone to help me with the cupcake display, so I asked for some help from my little friend Maeve. Her outfit (self-selected) fit the occasion and the spirit of the dessert and holiday.
Things have changed on the ice cream cone cupcake scene. You can now purchase a stand to support the cones while they're baking in the oven. No more tipped cones! The stand is also perfect for transporting your tasty treats.
For my cupcakes, I used a standard chocolate cake recipe. Use any recipe you would use for cupcakes. I filled the cones to just below the top section of the cone. You really don't want to overfill them, they'll spill over and make a mess. In fact, set the rack on a baking sheet just in case a cone or two go up and over the cone.
Once the cakes are cool, ice them with your favorite frosting and decorate with a sprinkles. What could be more fitting to enjoy a cupcake in the grass, than a fluffy skirt, sparkle necklace and stars on your tiara! I hope you'll make a batch and take them on your next picnic or backyard adventure!
To print this recipe, click HERE
The Little French Bakery's Chocolate Cake Recipe
Ingredients:
Makes about 2 dozen "Ice Cream Cones", or 2 eight-inch round layers
3/4 cup plus 2 Tbsp cocoa
2 eggs
1/2 cup vegetable oil
1 3/4 cup all-purpose flour
1 cup skim or 2 % milk
1/2 cup warm water
1/2 cup hot brewed coffee
1 1/2 tsp baking powder
1 1/2 tsp baking soda
1 tsp salt
1 Tbsp vanilla extract (real, not imitation)
Directions
Preheat your oven to 350 degrees F. Be sure the oven rack is centered in the oven.
In the bowl of a stand mixer fitted with the paddle attachment, or a medium sized mixing bowl, combine dry ingredients. Whisk to lighten and mix. Add eggs, oil, milk and vanilla. Using the stand mixer, a hand mixer beat batter on low to medium speed for 1 minute. Stop, scape the bowl's sides and bottom be sure all ingredients are well mixed. Beat for another 30 seconds. Carefully add the warm water and coffee. Switch to a spoon or spatula and throughly mix the liquids into the batter. The batter will be thin in consistency.
Spoon/pour the batter into the cones, do not fill more than half full. Bake 12-15 minutes, until a toothpick inserted into the cupcake is clean, and the cake springs back to the light touch. Be careful not to over-bake.
This recipe was adapted from the famous recipe on the Hershey Cocoa can. It's wonderful for cakes or cupcakes!
Toasted Coconut Marshmallow Bars
It's the countdown to the holiday weekend. Summer is in full swing and it's time to find fun, quick and easy treats.
I was in the grocery store today walking down the baking supply aisle as I always do, and an ingredient caught my eye. Toasted coconut marshmallows. Stop the cart! For those of you who can't stand the thought, taste, smell or texture of coconut, you may want to pass on this one. For those who are still reading, all I can say is... these are delicious!
One bag? Two bags? More? No, I'm wasn't sure what I was going to do with them, and if they were weird I didn't want too many bags hanging around. Now, what to do with them. Marshmallows.... s'mores? Maybe, but too obvious.
Rice Krispie bars? Curious. The idea hit. How about Special K instead of Rice Krispies? Not a huge change, but interesting. It fit the requirements. Fun, easy and as goofy as the marshmallows.
The recipe is the same as making Rice Krispie Treats. Melt the butter, add the Marshmallows. Add the cereal, mix and press into a buttered or oiled pan. I was a bit worried about the coconut scorching or burning. No problem. Just keep the heat at low/medium and you'll have no problem.
I spread the mixture into an eight inch cake pan, then drizzled with melted chocolate chips. The perfect combination in my book. Chocolate and Coconut.
To print this recipe, click HERE
Toasted Coconut Marshmallow Bars
1 bag Toasted Coconut Marshmallows (about 30)
3 cups Rice Krispies or Special K Cereal
2 1/2 Tbsp Butter or Margarine
1/3 cup chocolate chips, melted
Directions
In a large saucepan, melt the butter/margarine. It's ok if it browns just a little.
Add marshmallows, stir to melt.
Add the cereal. Stir to mix, crushing the cereal a bit as you stir.
Spread in a buttered baking pan or small, flat dish with sides.
Drizzle with melted chocolate chips if desired. Cool, cut, and serve!
I hope you have a Happy July 4th! Wave a flag, thank a fireman, be safe and be kind.
Hazelnut Maple Cookies (Wheat free!)
Here in Wisconsin it's been a long, cool spring. This week we've started to signs of Spring. My hens & chicks are popping out of the antique typewriter, the daffodils are blooming, and the strawberry plants are peeking through the soil.
Long before the plants were popping there was another sign of Spring. Maple syrup season. Wisconsin is on the edge of the maple syrup belt. Like coffee and chocolate is to the equator, there are few places on earth that support this product's production. The temperature must be above freezing in the day, and down to about 20 F at night. Sap runs into buckets or through hoses to be boiled into the liquid gold.
The land we live on was once a maple syrup farm. When we walk through the woods, we see tubing and pans from years and years ago. So far, we haven't tapped any trees, but someday we'll give it a try. Did you know that it takes gallons and gallons of sap to make just one pint of syrup? I was lucky to get to watch a sap cooking session this year - with a taste of the sap. It's much lightly sweetened water, almost like a fresh coconut water.
Now, on to the recipe! I promise there's a connection here.
Back in January, I went to a class in Brooklyn for a class. After class I met up my niece and her beau, they told me about "the best bakery in Brooklyn". Ovenly. They told me all about the gluten free items and raved about the cookies. I was hoping to get there during my stay but it didn't work out. Instead, I contacted the bakery when I got home to ask about their cookies. Would they share a recipe? You bet! And, it's a perfect recipe for spring. Delicious nuts, and sweet maple syrup.
It wasn't until about half way through the preparation that I realized these are gluten free. The cookies are amazing. A perfect tea time afternoon pick-me-up, or great for travel.
I didn't have any hazelnut flour on hand (who does?), so I ground the nuts in the food processor. I was about 2/3 cups short, so I made up the difference with almonds.
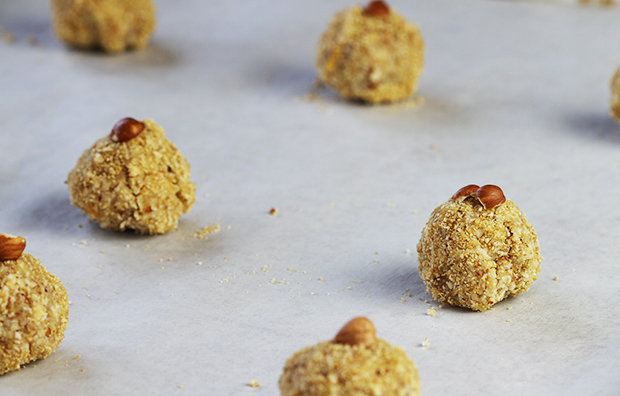
The nuts are blended with the egg white, zest, sugar and touch of syrup. Rolled into ping-ping sized balls, then rolled in the maple sugar and topped with a hazelnut half. Easy and fast. Here the the cookies ready for the oven. I would suggest pushing the nuts into the cookies just a little more. They look nicer that way.
After 12 minutes, and the best smell from the oven, the cookies are finishes. The maple sugar melts and creates and a crisp crust, with the nutty inside, perfectly baked. Wish you could smell them! The orange zest is a great addition, be sure not to leave it out.
Thank you to Erin and Agatha for sharing this great recipe, and Lauren for the tip. When you're in Brooklyn, stop by and see them. Their flagship shop is at 31 Greenpoint Ave., Brooklyn.
I hope you enjoy the cookies as much as I did!
Happy Spring!
To print this recipe, click HERE
Hazelnut Maple Cookies
Ovenly Bakery - Brooklyn
Ingredients:
4 1/3 cups hazelnuts
1 cup sugar
1 tablespoon maple syrup
zest of 1/2 orange
3 egg whites
Maple sugar for coating cookies
hazelnut halves for garnishing cookies
Instructions:
Preheat oven to 350 degrees F. Line a baking sheet with parchment paper and set aside.
In a food processor, pulse the hazelnuts until they form a coarse meal; the pieces should not be larger than about 1/8 inch in diameter. Transfer the ground nuts to a bowl. Add the sugar, syrup,egg whites and zest. Using a rubber spatula, mix the ingredients together until well combined. Cover the dough with plastic wrap and let sit until slightly dry to the touch, about 10 minutes.
Using your hands or a small scoop, form or roll the dough into 1-ounce balls. Coat in maple sugar and top with a half a hazelnut by pressing it into the dough. Place on the prepared baking sheet and bake for 12 minutes, turning at 6 minutes. Let cool completely
Macaroni Pie & Rum Punch - Classic Barbados Cuisine
What a difference a day makes! In just three times zones, well two with day light savings time in effect, we made our way from 14 degrees F and snow to 80 degrees and sunny. It's incredibly beautiful here. The people are warm, helpful, and great cooks. We're loving West Indian cuisine. The rich flavors and spices are steeped in tradition.
Before I tell you all about the food and in particular, Macaroni Pie, I have to share at least one rum punch photo with you. This one was taken at Brown Sugar, a very traditional Bajan (that's what people from Barbados call themselves) restaurant. Here's some trivia for you. Punch is derived from the word Panch which means 5. There are five ingredients in Rum Punch; Sweet, Sour, Strong, Weak and Spice.
The poem to remember the recipe is...
One of sour, Two of Sweet, Three of Strong and Four of Weak. A Dash of Bitter and a Sprinkle of Spice served well chilled with plenty of ice.
To print this recipe, click HERE
Barbadian (Bajan) Rum Punch
1 measure lime juice
2 measures simple sugar syrup
3 measures Dark Caribbean Rum
4 measures water ( or good quality fruit juice. Passion fruit is really good)
Dash of Bitters (Angostura) and some grated nutmeg
Mix together and pour over ice!
Adapted from Totally Barbados.com
A typical Bajan meal is fried, grilled or blackened fish, macaroni pie or beans & peas, salad, and vegetables. Pass the Bajan hot sauce and you're all set. Root vegetables are really big, so I'm happy as can be. I have to tell you, I'm obsessed with macaroni pie. Not so much for for its taste or good looks, but for its wonderful tradition in the culture. Pie, as they call it, is everywhere, and is a staple in every household.
Rose, a delightful sweet woman, is one of the maids at inn we're staying at. She's a grandma and knows her way around the kitchen. I asked her about her macaroni pie. She told me that no one really has a recipe, "they just make it, darlin". The manager of the hotel as well as the concierge joined the conversation. Each referring to an older family member who had passed down their recipe. "My mom adds mayonnaise", one said. "No mayo in ours, but we grate the onion and sweet pepper add just a bit of Bajan sauce for heat.", another added. Some make it one the cooktop before putting it in the oven. Others stir it together after the macaroni is cooked but only bake it. I loved every second of the debate.
Here's the meal at Brown Sugar. A piece of fried Flying Fish, macaroni pie and salad. The white sauce is a very smooth tartar sauce with Bajan sauce drizzled over the top for heat. The color is from Scotch Bonnet peppers. Bring on the heat!
To print this recipe, click HERE
Macaroni Pie
8 oz (1/2 pound) macaroni (the long tubes broken in 1/3 sections are most authentic
1 T butter or margarine
12 oz cheddar cheese, grated
1 egg
1 cup milk
2 tsp onion powder or 1-2 T grated onion
1 tsp hot English dry mustard
1 tsp white pepper
1 tsp salt
1/2 tsp red pepper sauce (optional)
2-3 T tomato catsup (optional)
For the garnish:
2 T breadcrumbs
2 tsp butter
2 T grated cheddar cheese
Preheat oven to 350 degrees F. Cook the macaroni in salted boiling water until tender, but not overcooked. Drain the macaroni and place in back in the hot pan. Mix in the butter. Add the cheese a little bit at a time. Whisk the egg in the milk then add to the mixture. Add the spices. Combine well and pour into an oven proof baking dish. Top with the butter, grated cheese and breadcrumbs. Bake 30-45 minutes until golden. The baking time will depend on the depth of the baking pan.
Adapted from Totally Barbados.com
So now that you've met macaroni pie & company, I'd like to tell you about the Oistins Market. Oistins is located at the South end of the island. It's a quiet end of the island with beautiful beaches and many more locals than tourists. As we walk past the post office and wooden shack (the bus terminal), we're greeted by a group of men sitting on buckets playing dominoes on the top of the steel oil drum. The banging sound and the laughter are heart warming as we pass. They look up with gentle smiles and always greet us hello.
Our part of the island is Oistins, a fishing community. When the boats arrive back to shore with the fish, the fish go straight to the market. Next to the market is are several stands. My guess is about 30. Each one is about 10' square. Names like Roslin & Sons, Janet's, Uncle George's and Pats are painted on the wooden boards. Picnic tables line the streets and tiny alleys with a huge stage in the center of the market for music and dancing. A few stands are open daily. But, on Friday nights everyone goes to Oistins. Locals and tourists. Grab a Banks beer, find a seat and prepare yourself for the freshest fish around. Huge lights in the shape of fish hang over the main street.
A chalkboard lists the fish for the day. We choose Uncle George's Fish Net this week. The stand is busy and lively. Reggae music plays loudly is the background, and the party had begun!
The food is hot, fresh, not too fancy and always delicious. My meal was mahi mahi with rice & peas with salad.
If you're traveling to Barbados and looking for some tips on where to stay and suggestions for restaurants here are my favorites.
Little Arches Hotel - At the South end of the Island. A small cozy and lovely hotel.
Naru, a great Asian Fusion restaurant and on the water
Nishi, another terrific Asian Fusion (can you tell we love seafood and sushi?)
Tapas, on the water and wonderful food, small plates or entree portions
And of course, Oistins Fish Market
Travel safe, be safe and be kind.
Caramelized Onion Dip aka French Onion Dip
Love Chips + Dip? Here's a dip that will amaze your friends.
Read moreLong and Slow Baked Apples
What are your plans for the weekend? In that organizing mood? I'd love to know how many of those plastic tubs are sold during January. Today I saw a display of them in very fancy colors. Personally, I like the clear ones so I can see what's inside. I guess I could label them and then it wouldn't be necessary to open each one to find my summer clothes. My new goal is things I'm not using get it out the door rather than squirreled away in the basement. We'll see! I think it feels good to have some routine back again after the holidays. Back from the free fall of sweets and dips. Don't get me wrong, it's still winter and comfort food is still very welcome. Now it's time for slow roasting, nice smells and healthier options.
There's comfort food, and then there's great comfort food. What could possibly be better than creamy, sweet baked apples? This is an Around My French Table recipe, by Dorie Greenspan. As you know, I love simple, yet a little fussy recipes. I think you'll love this one. Why?
1. You get to use ramekins. You know you love them.
2. You get to use your mandolin. Promise, promise, promise you won't use it without the guard.
3. You'll practice your apple peeling.
4. You'll bake with plastic wrap. Something I did in Paris and thought I'd never do again. It works, really!
5. The result is a delicious apple dessert -so creamy and rich, it's almost like custard. It's well worth the fussy preparation.
The recipe is actually pretty simple, just a little time consuming. Peel, core and slice apples. I used Fuji and they were a really nice texture and flavor. Be sure they're sliced very thin.
Then layer the slices with melted butter, and sugar that has been spiced with ginger and orange zest. I skipped the ginger and used nutmeg instead. The slices fit perfectly into the ramekins and towered over the top.
Then, wrap the ramekin in plastic wrap, then foil. Make a few puncture holes in the top and cover with another ramekin to provide just a little pressure to the apples while they bake.
Now, find a good book - or a closet to clean. The apples will bake for two hours at 300 degrees F. After they're baked, let them cool all wrapped up for 15 minutes or so, then carefully unwrap them. It's amazing!
I went a little crazy and made three recipes from Around My French Table. The herbed spaetzle, the Orange Pork Tenderloin and the Long and Slow Baked Apples. It was a wonderful meal. The pork and fragrant fruits were a nice combination. The apples were a light yet very satisfying dessert ( with some sweetened whipped cream!)
When I make these again, I'm going to turn the apples out on to a plate and serve them with a dollop of creme fraiche. It's always a perfect match with apples. Do you know how to make creme fraiche? It's very easy, but requires a little planning.
To print, click HERE
Creme Fraiche
2 cups Heavy Cream
2 T Buttermilk
Mix together, and allow to set uncovered at room temperature overnight ( or about 8-12 hours). You can use it right away or stir, cover and chill. The mixture will continue to thicken and become more tangy. You can keep it up to about 2 weeks in the refrigerator. If you don't need so much, feel free to divide the recipe and only make a half batch.
Stayed tuned everyone! I'm heading to Paris and will try to send you photos and do a few blogs posts. Is there anything you'd like to see or read about while I'm there? What a nice coincidence that next week's Around My French Table recipe in a French Apple Tart. Tres Bien!
Gingerbread Cakes
What a day! What a week! I'm happy to be back baking and blogging. Holiday decorations are going up, and I'm starting to get in the spirit. I hate to admit it, but I'd like a little snow instead of the balmy 60 degree days we've been having. I'm sure I'll regret that thought about February. I'd like to start off by wishing a big Happy Birthday to my husband, Gary! The kindest, sweetest person in the world. It's been a big year for him. Recently, he packed up our Prius and went off to New York City to help with the recovery efforts from hurricane Sandy. No special reason, just overcome with the desire to help. To celebrate his birthday, I've made baby gingerbread cakes.
The recipe coincides with my Baking with Julia blog group. To bake along, you can find the recipe at Karen's Kitchen Stories.
As I write this, I'm still cracking up from my dumb baking blunder. More on that later...
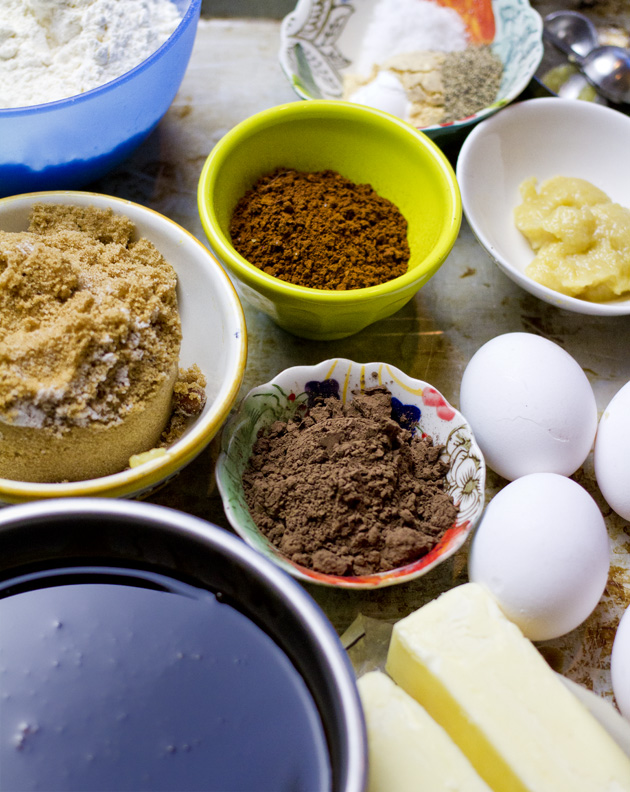
The recipe has some great ingredients including black pepper, cocoa, instant espresso, and fresh ginger. The smells are amazing. I found a tube of fresh ginger in the produce section of the grocery. I liked it a lot. It was very smooth, and made for easy measuring and smooth fresh ginger in the batter. You can see it in the photo in the white bowl off to the right.
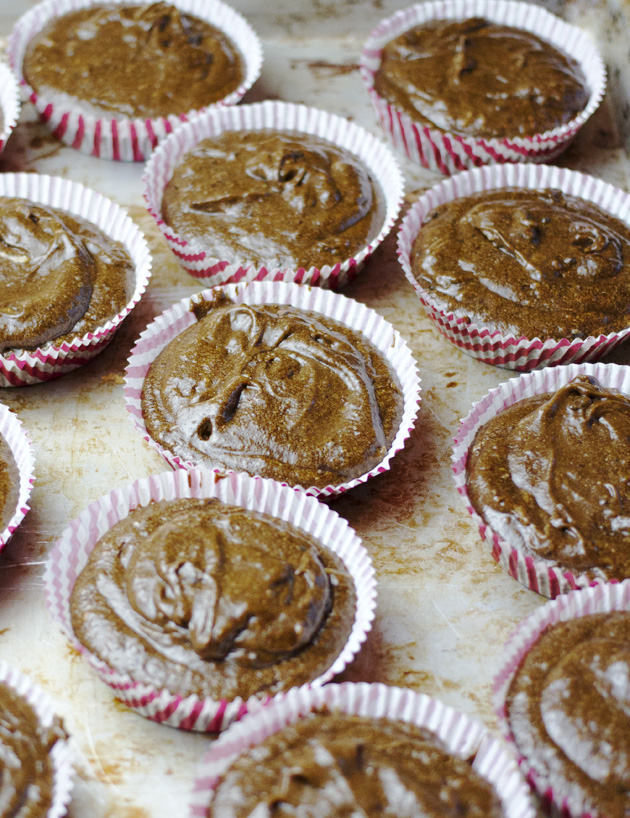
This is where the craziness comes in. I bought the cutest little paper cups for holiday baking. They were just a little smaller than 4 inches, but I though they'd be perfect. I could serve the cakes in the papers or unwrap them just before serving. The batter was ready, and I gently spooned the batter into the cups.
After a few minutes, I started to wonder where the cups were getting support as the batter expanded. Guess what? No where! The sides were drooping the batter was oozing out onto the baking sheet. I prepared for round 2 and let the mess finish baking. Here's what happens when you don't have a study container around a paper baking cup. I was able to peel a few apart, and salvage at least a few. I used a 10" cake pan for the next batch, and plan to use it for Gary's birthday dinner tonight. For anyone who's every felt intimidated to bake with me, this should make you feel much better!
I'm still crazy about the little red cups, and will plan to use them again. I just can't quite figure out what kind of pan to use do the contents don't spew out.
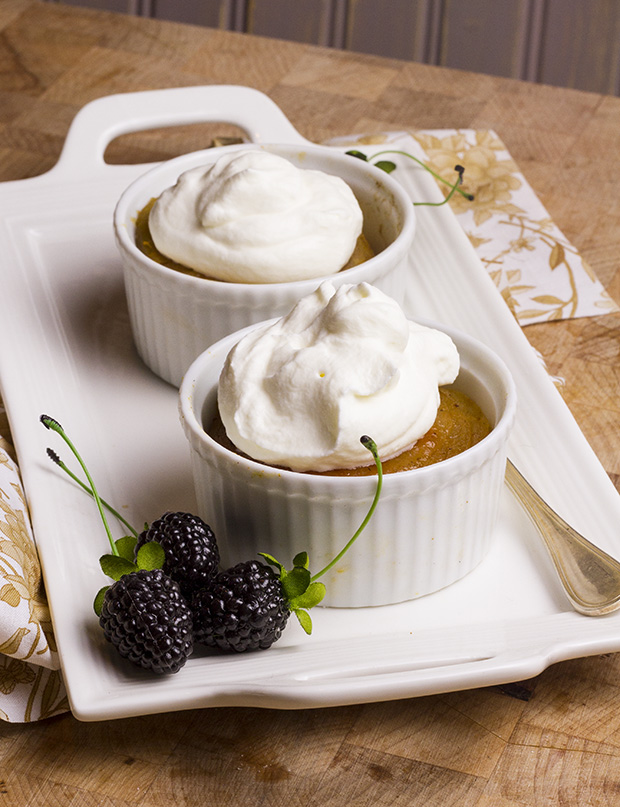
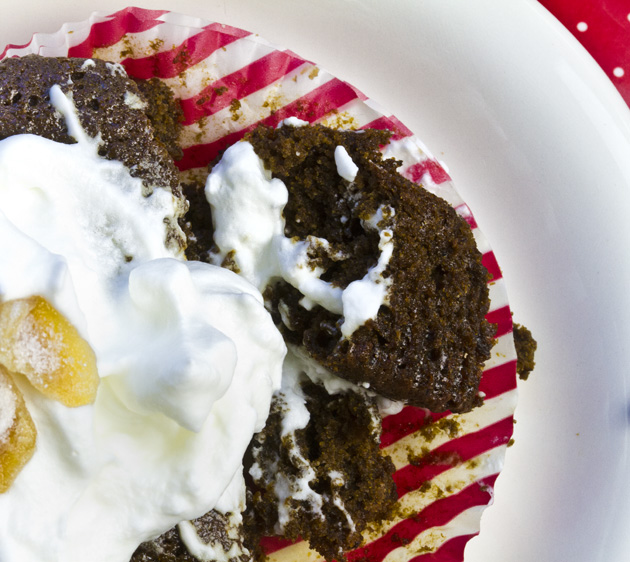
The whipped cream was sweetened with powdered sugar and garnished with a few pieces of candied ginger. The reviews so far have been great! I really like the flavor and texture of this wonderful cake.
Popovers
Beef Wellington, check. Blue cheese Souffle, check. Graham crackers, check. These are all things I've made in the last year that I've always wanted to try. Call it a culinary bucket list of sorts. What's on your list? Maybe it's simply roasting a chicken. No one will make fun of you. Give it a try. What's the worst thing that can happen? Frozen pizza?
three-popovers-4
I can't believe that this is the first time I've ever made popovers. In the past I've tried to make the Dutch/German puffy pancakes without much success. It seemed like a popover was in the same mystery family, so I've always found another option. Today was the day. Thanks to Baking with Julia and the Dorie Greenspan Tuesdays with Dorie group, Popovers made it on the calendar.
Much to my surprise, they were easy! A quick brrrrr in the blender, 45 minutes in the oven and ta-da! Tasty, dreamy popovers. And without gooey centers, I might add.
The ingredients are super simple. Flour, eggs, milk, salt and a butter. The usual suspects.
ingredients-1
When all the ingredients are at room temperature, they get a quick brrrrr in the blender. I've always wanted to include an overhead blender shot, so here it is!
Blender with popover batter
I don't own a popover pan, so I opted for the muffin cups with 1/4 cup batter in each cup. I very skeptically put the pans in the oven and walked away. Then walked back and turned the oven light on. This was too good to miss. After a few minutes the popovers started to pop, and I knew I was in business. Twenty-five minutes later, I reduced the oven temperature and waited for the finished beauties. They were crisp, light, and best of all... not gooey in the middle. I split one open, spread a little more butter and drizzled it with honey. Why was this the first time I'd made these? I hope you'll go to Paula's blog, Vintage Kitchen Notes, or Amy's blog, Bake with Amy to find the recipe and give popovers a try.
popovers-on-tray-3
single-popover-5
Now on to the next new-to-me recipe... I think it might be pretzels using real lye! Stay tuned.
French Fridays with Dorie - Sardine Rillettes- Not scary, really!
This week's French Fridays with Dorie recipe is Sardine Rillette. A wonderful quick, easy little appetizer spread. I personally like sardines. Growing up, my mom doesn't like steak. If our family was going to have steak she opened a can of sardines, spread some butter on bread, and carefully laid the sardines side by side on top of the butter. We could join her, or eat steak. I always choose the sardines. There was something about the whole ceremony that appealed to me. When you open a can with a key, and carefully roll back the metal top, it has to be good! I know not everyone shares my love. This recipe is really worth trying to acquaint yourself with sardines.
The recipe calls for 2 cans of sardines, and other ingredients that you probably have on hand. A little cream cheese, shallot, some herbs, and juice of a lemon. Guests are coming? You can have this ready in less than ten minutes. I used chives. They're growing outside our kitchen door, and I try to use them whenever I can.
I was a Trader Joe's and found two kinds of sardines. Some in oil, and some in water. I bought a can of each to see what they were like. Sardines are much bigger now than I remember. I remember little guys about the size of your pinkie or slightly bigger. They guys are big (well, little but big) and packed in like sardines. Sorry, had to work that in somewhere! In one can, the sardines still had spines, so I pulled those out. I know they would have crushed, but just couldn't leave it in. Here are the two cans side by side.
Some chopping and snipping and the ingredients were ready to combine.
The sardines easily combined with a fork. The final preparation is a lot like a simple tuna salad. It would be really nice piped into the little puff, or a cherry tomato. Hope you'll give it a try!
Next Tuesday is a lovely lemon cake by Julia. Love lemons. Talk to you soon!
Chocolate Darlings - Cocoa Sables from FFWD
This week's French Friday's with Dorie recipe is Cocoa Sables. Sweet, crisp, chocolatey little darling French cookies. The should be an accent over the "e". I've been trying to figure out how to create that character without much success. From here on, please pretend it's there. Sables were the very first recipe we made in pastry school. For those of you sick and tired of pastry school stories, please skip ahead. This is a good one though. Our class went to the very first demonstration where we carefully watched the chef make a variety of sable, or butter cookies. He stacked butter cookie dough on chocolate dough and made beautiful stripes, swirls and lunettes (eyeglasses.) One sable he called "dee -a -monde". The translator repeated the word Diamond. The name reflects the way that the tube of dough is brushed with egg and rolled in coarse sugar to make it look like it's rolled in diamonds. There were a few moments when I can think back and know they had me. This was one of those moments.
I used a block of bittersweet chocolate and chopped/grated it very fine. It added a lot to the cookie, and I would highly recommend it.
Back to school. When we got into the kitchen, we were introduced to weighing ingredients for the first time. The recipe called for 5 grams of salt. If we had thought about it, how much salt can there be in a cookie recipe? Well, we set off to the salt bin carrying mixing bowls that could have held 10 pounds of bread dough! We can back with what equaled about a teaspoon! We can laugh now. At the time, all business.
Dorie's recipe uses a creamage method, using room temperature butter and gently mixing in all the dry ingredients. I really liked adding the chopped chocolate for a little extra boost of chocolate taste. I don't have a lot of how-to pictures this week. Here's the dough sliced and ready for the oven.
The dough is rolled into logs and chilled. During the chilling time, I pulled them out a few times to reroll and reshape the logs. As the soft dough chills, it can get a flat bottom. Rerolling, helps make the roll even and not lopsided. The dough sliced easily. A few of the disks had to be schmoosed back together. The smell of the cookies baking a amazing! Here's a tip. When you can smell chocolate in the room, you can be sure that your dessert is almost done. I always wondered how the chefs knew that things were finished before the timer ever went off.
The Sable are so good. This is a great dough to have in the freezer to quickly slice and bake for an impromto dessert, or to satisfy a chocolate craving! No need to defrost, just slice and bake.
Have a great weekend, next week is Crab and Grapefruit Salad- curious?
