Angel food cake is a favorite of many! Learn to make this delightful cake from scratch. Take the free class for creating perfect fluffy angel food cake frosting.
Read moreBonjour!
What a month this has been! There's so much to tell you. First, I'll tell you the really big news. Early this Spring, I presented a book proposal to a publisher who loved it! We've signed the contract so in 2014 I'll have a cookbook. The book will have the recipes I teach here at The Little French Bakery with many others. I'll be doing the photography and adding stories with the recipes. As the writing and editing progresses, I'll keep you posted with details of the book's release. It's incredibly exciting. It will be published by Skyhorse Publishing, New York.
What else? Recently, we were in France, on a barge with friends cruising on the Canal du Midi. Our barge was named Emma. The hosts, crew and views were wonderful. I'll be writing more on the barge life in a future post. I had every intention of blogging on our trip but due to technical difficulties, (a brain cramp on my part) I couldn't get to my blog to write using my Ipad. I debated about bringing my laptop and didn't. Big mistake. I've missed writing, but I have so much to show and tell. Our trip also included a weekend in Bruge, Belgium and several days in Paris before and after the barge trip. We had time to walk the streets and take it all in. There are so many great places I've wanted to tell you about, and now I have photos to help.
Here are just a few of my favorite sights from Paris. My postcard to you.
Cafes. I love the chairs, tables, place settings, and ambiance. The streets were lined with tables filled with Parisians and tourists soaking up the sunshine.
A Fromagerie. Cheese as far as you can see. The smells are incredible (as long as you like cheese!) We had just come off the barge where we enjoyed many great cheeses. It was a treat to look in the case and recognize some of the names of cheeses that were new to us. A new favorite, Mimolette. Bright orange, sharp and crumbly. It looks like of like a cantaloupe. It's in some cheese shops. I highly suggest picking up a small piece. to try. I can't write about cheese without mentioning Morbier. A beautiful semi-soft cheese with an ash layer separating and layers of cheese.
And of course, the Tour Eiffel. When we checked into the hotel for part deux, the receptionist at the Madeleine Hotel asked if we would like to be on the floor that views the Eiffel Tour. She didn't have to ask twice. The third frame is the view out our window at dusk. When we got back to our room after dinner, I sat on the edge of the bed with my camera for a least an hour watching the color of the sky change and took too many photos of this view- if that's possible. I woke up in the middle of the night and looked back out again for a few minutes. It's a view that I never tire of. Gorgeous.
And who can get tired of seeing and tasting macarons? Not me! Our friend stopped by a patisserie and picked an an assortment for the train ride. Here they are. So pretty and so delicious. Did you know that only the middle of a macaron has the flavor? The color is just for suggestion (except for the chocolate ones). These were especially colorful.
One of the highlights of our time in Paris was a meal at Benoit, an Alain Ducasse restaurant. We went to lunch and had great cassoulet, a delicious bean and meat stew. It's the best I've ever had. Okay, I say that every time we go there. After the meal, as we were having coffee, our waiter stopped by with the tray of just-out-of-the-oven Madeleines. They were perfect. It was so fun taking them from the pan tray rather than having them served on a plate. It was like sneaking them from the kitchen before they were ready to be served. Here's my quick snap shot.
Now you can make Madeleines too. I like them left out overnight so they're crunchy. Others like them soft, right from the oven. I think the second bite is always the best. If you need a mold, check with a local kitchen shop. Most stock them. Just ask for a Madeleine pan.
To print this recipe, click HERE
Madeleines
- 200 g melted butter (14 Tbsp) (cool and allow solids to settle )
- 4 eggs
- 170 gm granulated sugar (3/4 cup plus 2 Tbsp)
- 1 pinch salt
- 10 gm honey (1 Tbsp)
- 5 gm baking powder (1 tsp)
- 180 gm flour (1 3/4 cups plus 1 Tbsp.)
Melt butter and cool.
Sift flour with baking powder. Mix sugar and eggs to near ribbon stage. Add vanilla, lemon/orange zest. Add flour. Fold into egg/sugar mixture. Add honey. Add butter, leaving milk solids in container. After mixing, place in refrigerator to cool slightly/stiffen. Butter molds well, then flour. Place molds in refrigerator to firm butter if necessary. Use a pastry bag if needed to fill molds about 2/3 full in an oval top to bottom in the center of the mold. Bake at 350 for about 6 minutes or until puffed and golden. Immediately tap/rap on counter to knock madeleines out of pans and cool on wire rack. 1 recipe fills 2 molds.
If you're heading to Paris, be sure to check out my Paris Notebook. There are suggestions on places to go, eat and help with shopping for cooking equipment and more. I'll be adding more info and photos our most recent adventures.
Be kind, and enjoy!
Gingerbread Cakes
What a day! What a week! I'm happy to be back baking and blogging. Holiday decorations are going up, and I'm starting to get in the spirit. I hate to admit it, but I'd like a little snow instead of the balmy 60 degree days we've been having. I'm sure I'll regret that thought about February. I'd like to start off by wishing a big Happy Birthday to my husband, Gary! The kindest, sweetest person in the world. It's been a big year for him. Recently, he packed up our Prius and went off to New York City to help with the recovery efforts from hurricane Sandy. No special reason, just overcome with the desire to help. To celebrate his birthday, I've made baby gingerbread cakes.
The recipe coincides with my Baking with Julia blog group. To bake along, you can find the recipe at Karen's Kitchen Stories.
As I write this, I'm still cracking up from my dumb baking blunder. More on that later...
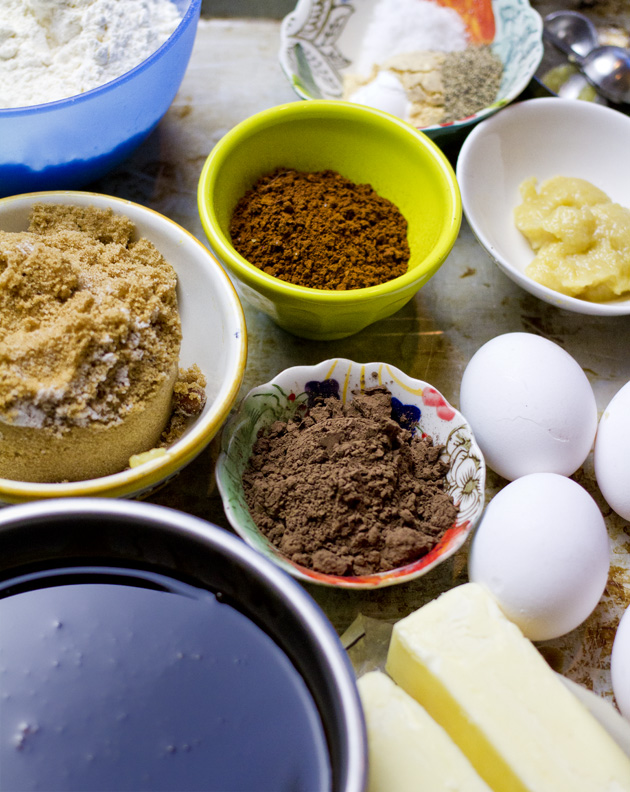
The recipe has some great ingredients including black pepper, cocoa, instant espresso, and fresh ginger. The smells are amazing. I found a tube of fresh ginger in the produce section of the grocery. I liked it a lot. It was very smooth, and made for easy measuring and smooth fresh ginger in the batter. You can see it in the photo in the white bowl off to the right.
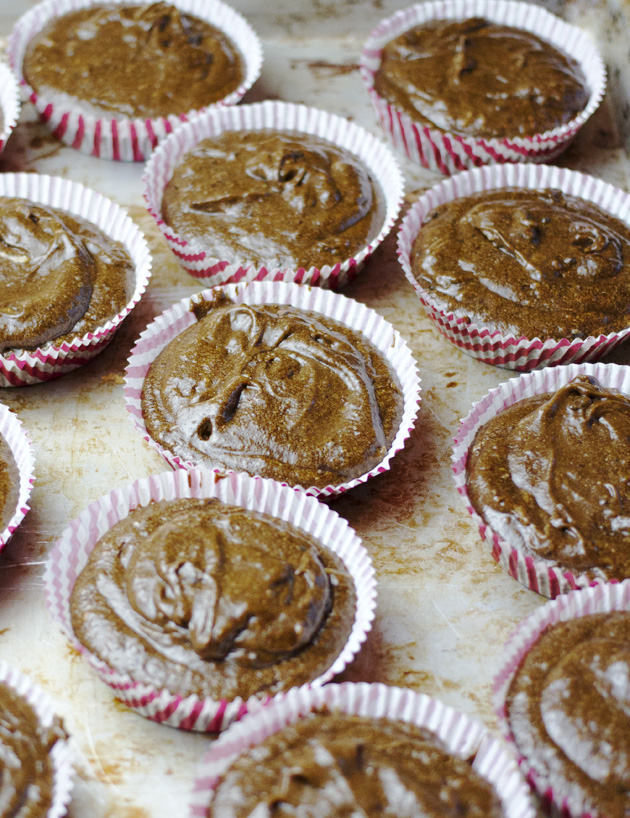
This is where the craziness comes in. I bought the cutest little paper cups for holiday baking. They were just a little smaller than 4 inches, but I though they'd be perfect. I could serve the cakes in the papers or unwrap them just before serving. The batter was ready, and I gently spooned the batter into the cups.
After a few minutes, I started to wonder where the cups were getting support as the batter expanded. Guess what? No where! The sides were drooping the batter was oozing out onto the baking sheet. I prepared for round 2 and let the mess finish baking. Here's what happens when you don't have a study container around a paper baking cup. I was able to peel a few apart, and salvage at least a few. I used a 10" cake pan for the next batch, and plan to use it for Gary's birthday dinner tonight. For anyone who's every felt intimidated to bake with me, this should make you feel much better!
I'm still crazy about the little red cups, and will plan to use them again. I just can't quite figure out what kind of pan to use do the contents don't spew out.
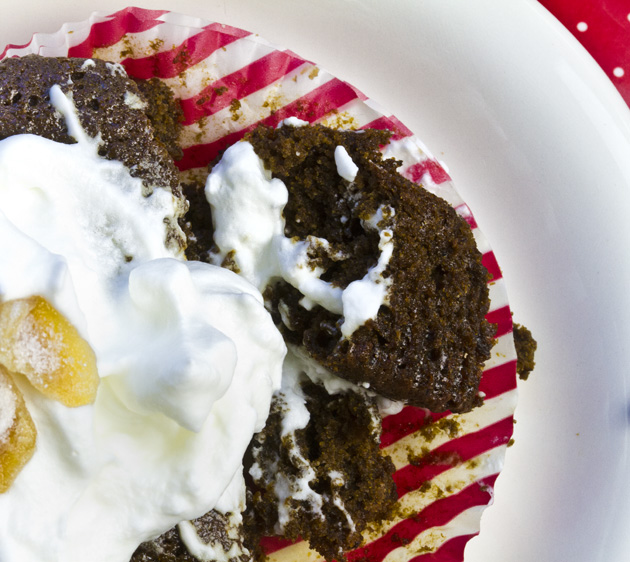
The whipped cream was sweetened with powdered sugar and garnished with a few pieces of candied ginger. The reviews so far have been great! I really like the flavor and texture of this wonderful cake.
Rich Chocolate Cake (plus... a treat for gluten-free bakers!)
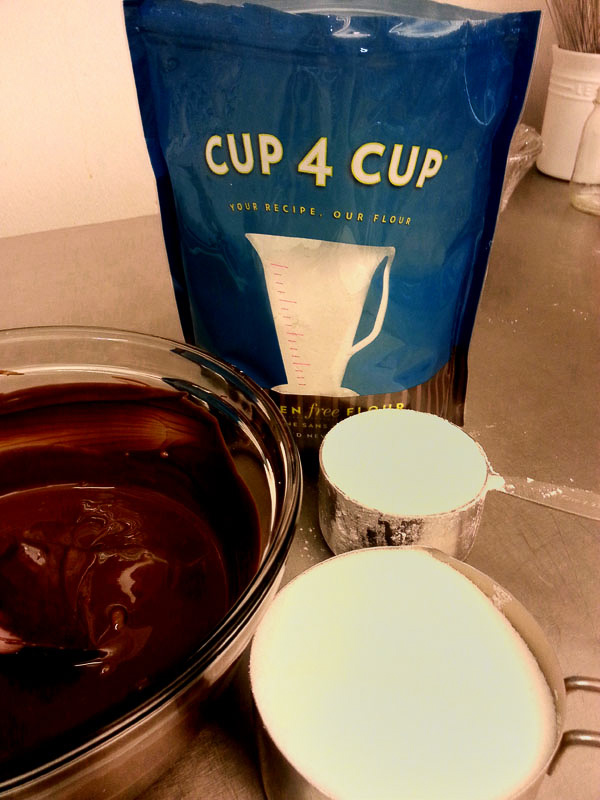
There's a chill in the air, and it's time to start baking! Something warm, comforting and delicious. Here's just the dessert. You'll love this one! I made this cake for Gary about 25 years ago. (and ever since...) It was a surprise for a his birthday. We weren't really even dating yet, but I think this may have sparked the flame. Our friends just celebrated their 45th anniversary and I made this for them. It's very romantic, and perfect for a party. The best news... I substituted Cup 4 Cup gluten free flour, for the wheat flour. It worked perfectly. No one could tell the difference including me. Here's the recipe that will make you a star as the holidays roll in. Everyone I know loves this cake. It's dense, very chocolatey, and even appeals to those who claim not to really like chocolate. You can serve it at room temperature or cold. Invite friends because one cake goes a very long way since it's so dense. The ingredients are pretty simple. Melted chocolate, butter, a dozen eggs, sugar and some flour. I bet I had you at melted chocolate. I used Cocoa Barry 58% French chocolate. Use any bittersweet/semisweet you like. Just not milk, it will be too sweet.
My Lost Crates box this month from Joy the Baker, included vanilla beans, vanilla extract and a big bag of Cup 4 Cup gluten free flour by Thomas Keller. When Chef Keller does something, it's always great. The flour looks and feels like wheat flour. No funny taste, smell or texture. I would highly recommend going finding some right away and giving it a try. If you have a moment, follow the link to Lost Crates. It's always a surprise and very fun!
To print this recipe, click HERE
Dark Chocolate Cake
14 ounces semisweet chocolate (the darker, the better
12 eggs, separated
2 cups granulated sugar
3 1/2 sticks butter, softened
1 cup unbleached flour, sifted (or 1 cup Cup 4 Cup flour)
Confectioner's Sugar for serving
Preheat your oven to 325 degrees F. Butter and sugar an 10 inch spring form pan. Tap out any excess sugar.
Break or chop the chocolate into small pieces and melt in microwave or in a pan placed over another pan of barely simmering water. Stir until smooth, and cool slightly. Be careful not to burn the chocolate.
Beat the egg yolks and sugar until they are pale and light yellow. When you lift the whisk or beater over the mixture, there should be a ribbon of the mixture that falls from the beaters and gently lays on top of the egg/sugar mixture. Add the chocolate and mix thoroughly. Stir in the butter, and flour.
In another bowl, beat the egg whites until they are stiff. Spoon a spoonful of the chocolate mixture into the egg whites and mix. Then add the egg whites to the chocolate mixture, folding very gently until mixed. Be very careful not to overmix, or deflate the batter.
Pour the batter into the prepared pan (it will come close to the top) and set on the rack (middle rack) and bake for 1 hour and 20 minutes. A cake tester or toothpick should come out clean when inserted into the center of the cake. The cake will rise and crack, but will settle as it cools. Cool on a rack for 15-20 minutes, then release the ring of the springform pan. Allow the cake to cool, then refrigerate until cold. It's best to wait until the cake is cold to remove the bottom of the springform.
To serve sift with powdered (confectioner's) sugar, and some whipped cream, if desired. Makes 20 servings (small... but rich)
Adapted from The Silver Palate Cookbook.
Here's the cake on it's pedestal at the anniversary get-together. I wish you could smell it... it's SO good.
I'd love to hear how your cake turns out! Cheers.
Nectarine Upside Down Chiffon Cake
this is my invariable advice to people: Learn how to cook, try new recipes, learn from your mistakes, be fearless, and have fun. Julia Child. From My Life in France.
This has been my mantra for the past week getting ready for this recipe.. Learn from your mistakes, try something new, have fun, try new recipes, have fun... be fearless. Got it!
As one of this week's Tuesday's with Dorie recipe hosts, my job is to provide the Nectarine Upside Down Chiffon Cake recipe, and give you the best tips and tricks I can. Marlise, from The Double Trouble Kitchen, is your other host. I've been wanting to be a host for a long time. I'm so happy to provide you with the recipe and be one of the "blogs of the month"! It takes me back to being the child in school who got to pass out the graham crackers, or put up the calendar numbers on the bulletin board. When I saw the title, my first reaction was, chiffon? Oh boy... I really wanted, and hoped it would be fine on the first try. After all, I'm supposed to know what I'm doing and be able to teach others. Time for some fun and fearlessness.
This is a grand, big girl/boy recipe. It's a boeuf bourguignon of desserts. Multiple steps, a few tricky details, and magnificent results. I know you can do it. Follow the recipe and the tips, and you'll have a great, fancy dessert to share.
The first step was to find a 10" spring form pan. I rummaged through my collection of pans, got out the ruler to measure, and ta-da... check. Don't be tempted to use a smaller pan. The recipe just fits into the 10" model. If you must, just don't put all the batter into the pan. It will be almost to the top.
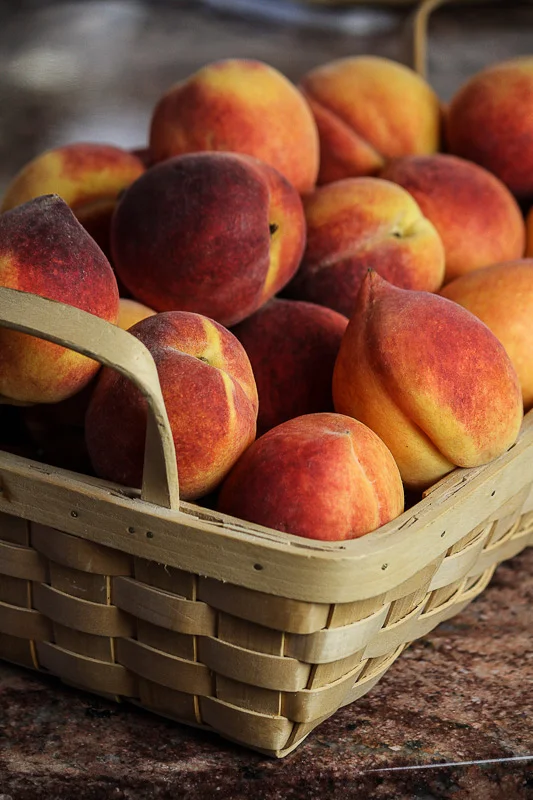
This recipe used the last of my vacation peaches. What a perfect recipe for such wonderful fruit. The recipe calls for nectarines, so what's the difference? Peach fuzz. I popped the peaches in boiling water, counted to 20, rinsed under cool water, and slipped off the peels. They were juicy, and perfect for the recipe.
You'll start the recipe by melting some of the butter in the bottom of the pan, adding brown sugar, and arranging the sliced fruit on top of the sugar. Not so bad at all. Be sure to wrap your pan in foil so the butter doesn't drip on to the floor of your oven when the cake goes in. Even with the best foil work, you may still have drippage.
Now on to the streusel. I used chopped pecans instead of almonds, and didn't toast them before adding them to the other ingredients. Add the ingredients to the food processor and pulse until you have nice clumps of streusel. The baking time of 12 minutes was perfect. The kitchen smelled great! Warm, buttery and delicious.
The third step is the chiffon batter. You'll be making a classic French meringue. Be sure your egg whites are in an extra clean bowl, free of any yolk specs. You may want to place the bowl over another bowl of warm water to gently warm the egg whites. They'll whip faster and fuller than if they're cold.
What makes this French meringue? Since the cake will be baked, the egg whites are not heated as they are in Swiss Meringue. The sugar in French meringue is not cooked (that's Italian meringue!). This meringue is medium peak egg whites whipped together at the end with sugar until shiny and firm. This is the easiest of meringues, but still requires special attention. Once your meringue is shiny, and firm, you'll fold it into the yolk mixture.
To fold: Hold your spatula perpendicular to the surface. Cut straight in and down, then follow the edge of the bowl, up and over the top allowing the whites and yolk mixture to gently fall from the spatula. Gentle! Rotate the bowl, about 1/4 turn and repeat. It will take several folds. The batter should be light and homogeneous.
Place 1/2 of the over the fruit, add all but a few tablespoons of streusel, then add and smooth the remaining batter over the streusel. The chiffon cake recipe states that it should be for 45-50 minutes. I checked mine at 45, 55...65...75...85...90... minutes. At this point, I was worried sick, and making plans for a redo, and writing the story in my mind about how I had tried and failed at this classic dessert. Remember... be fearless and have fun! Just past 1 1/2 hours of baking, the cake was firm to the touch and the toothpick came out clean. The surface was golden brown, but I had no idea of what the fruit and sugar were going to look like at the bottom. In another 25 minutes, I'd find out.
Twenty five minutes later, I attempted to release the springform ring. The edges were stuck and I was about to rip the cake. Whoops! I used a butter knife to gently release the cake from the side of the pan. It released perfectly, and was ready for the flip.
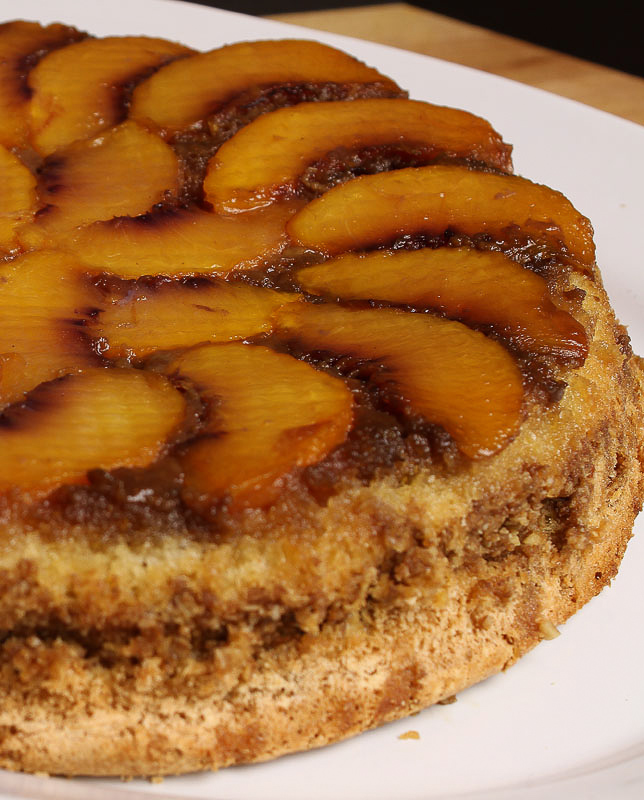
You can see the little dimples from the bottom of the spring form pan. A sprinkle of streusel and the beautiful chiffon cake was finished.
To print this recipe, click HERE
Nectarine Upside-Down Chiffon Cake
For the Topping:
1/2 stick (2 oz) unsalted butter
1 cup, packed brown sugar
3-4 ripe medium nectarines (the number will depend on size), each cut into 8 pieces
Center a rack in the oven and preheat the oven to 325 degrees F.
Cut the butter into 3 or 4 chunks and toss them into a 10 inch springform pan that's 3 inches high. Place the pan directly over medium-low heat and melt the butter, tilting the pan so that the butter covers the bottom evenly. Remove the pan from the heat and scatter the brown sugar evenly over the butter, patting it down with your fingertips. Arrange the nectarine pieces in concentric circles over the sugar. For a fancier effect, alternate the way the nectarines face from circle to circle. Wrap the bottom of the pan in aluminum foil to catch any butter that might drip during baking and set the pan aside.
For the Streusel:
1/4 cup unblanched whole almonds
1/3 cup all-purpose flour
1/4 cup packed dark brown sugar
1 tsp cinnamon
1 tsp ginger
1/2 stick cold unsalted butter, cut into small pieces
1/2 cup quick cooking oats, (not instant)
Put the almonds on an ungreased jelly roll pan and bake them until golden brown and fragrant. About 10-15 minutes. Stir frequently so that they toast evenly. To test for toastiness, break on open, it should be light brown in the center. Cool the almonds before proceeding.
Line the jelly-roll pan with parchment paper and keep at the ready.
Put all the struesel ingredients, including the almonds, into the work bowl of the food processor fitted with the metal blade and pulse just to mix the ingredients and chop the almonds and butter. The mixture will be rough and crumbly. Spread the streusel out on hte pan and if you'd like to have a few largish lumps for textural interest, squeeze some the streusel lightly between your hands and then break the big clumps into smaller bits.
Bake the streusel for 10-15 minutes, stirring once or twice, until golden brown. Transfer the pan to a rack an cool while you make the cake. Keep the oven at 350 degrees F.
For the Cake:
1 1/2 cups sugar
1 cup all-purpose flour
1 tsp baking powder
1 tsp baking soda
1/4 tsp salt
4 large eggs, separated
1/2 vegetable or safflower oil
1/2 cup fresh lemon juice
2 large egg whites
Ice cream or whipped cream, for serving (optional)
Sift together 1 sup of the sugar, the flour, baking powder, and baking soda onto a sheet of parchment or waxed paper; add the salt.
In a large bowl, whisk together the yolks, oil, and lemon juice until blended. Gradually add the dry ingredients to the yolk mixture, whisking all the while; set aside.
Beat the 6 whites in the bowl of a mixer fitted with the whisk attachment, or work with a hand-held mixer. At low speed, beat the whites until thy're foamy and form very soft peaks. Increase the mixer speed to medium -high and gradually add the remaining 1/2 cup sugar, beating until the whites are thick and shiny and hold peaks. (If you run a finger through the whites, it should a leave a smooth, even path.) Fold about one third of the whipped egg whites into the yolk mixture to lighten it, then turn the yolk mixture into the whites and fold it in gently but thoroughly.
Baking the Cake: Pour and scrape half of the batter into the fruit-lined pan. Smooth the top, using an offset spatula, and sprinkle ever the streusel, keeping a little in reserve for decoration the finished cakes. Top with the remainder of the better, smoothing it with the spatula, an place the pan on a jelly-roll pan. Bake in the 350 degree oven for 45-50 minutes, or until golden and a toothpick inserted in the center comes out clean. Remove the cake to a cooking rack and let it cool for at least 25 minutes before inverting onto a cardboard cake round or a serving platter.
Serve the cake with ice cream or lightly sweetened whipped cream if desired and a sprinkle of the remaining streusel.
Storing: The cake is best served just warm or at room temperature the day it is made. However, you can cover the cake and keep i t at room temperature over-night.
Makes 8-10 servings. Contributing baker, Mary Bergin
The cake is just as it's described in Baking with Julia. It's light, buttery and delicious. The streusel and peaches were a perfect pair. I hope you'll try this recipe. Try a new recipe, be fearless and have fun!
